Contract
Notes For the creation of direct sales and resale contracts, a lead and a business opportunity should be created first, and the contract should be generated from the winning business opportunity. For export contracts, the contract can be directly created.
Create a Contract (Illustrated with Direct Sales as an Example):
Convert Business Opportunity to Contract
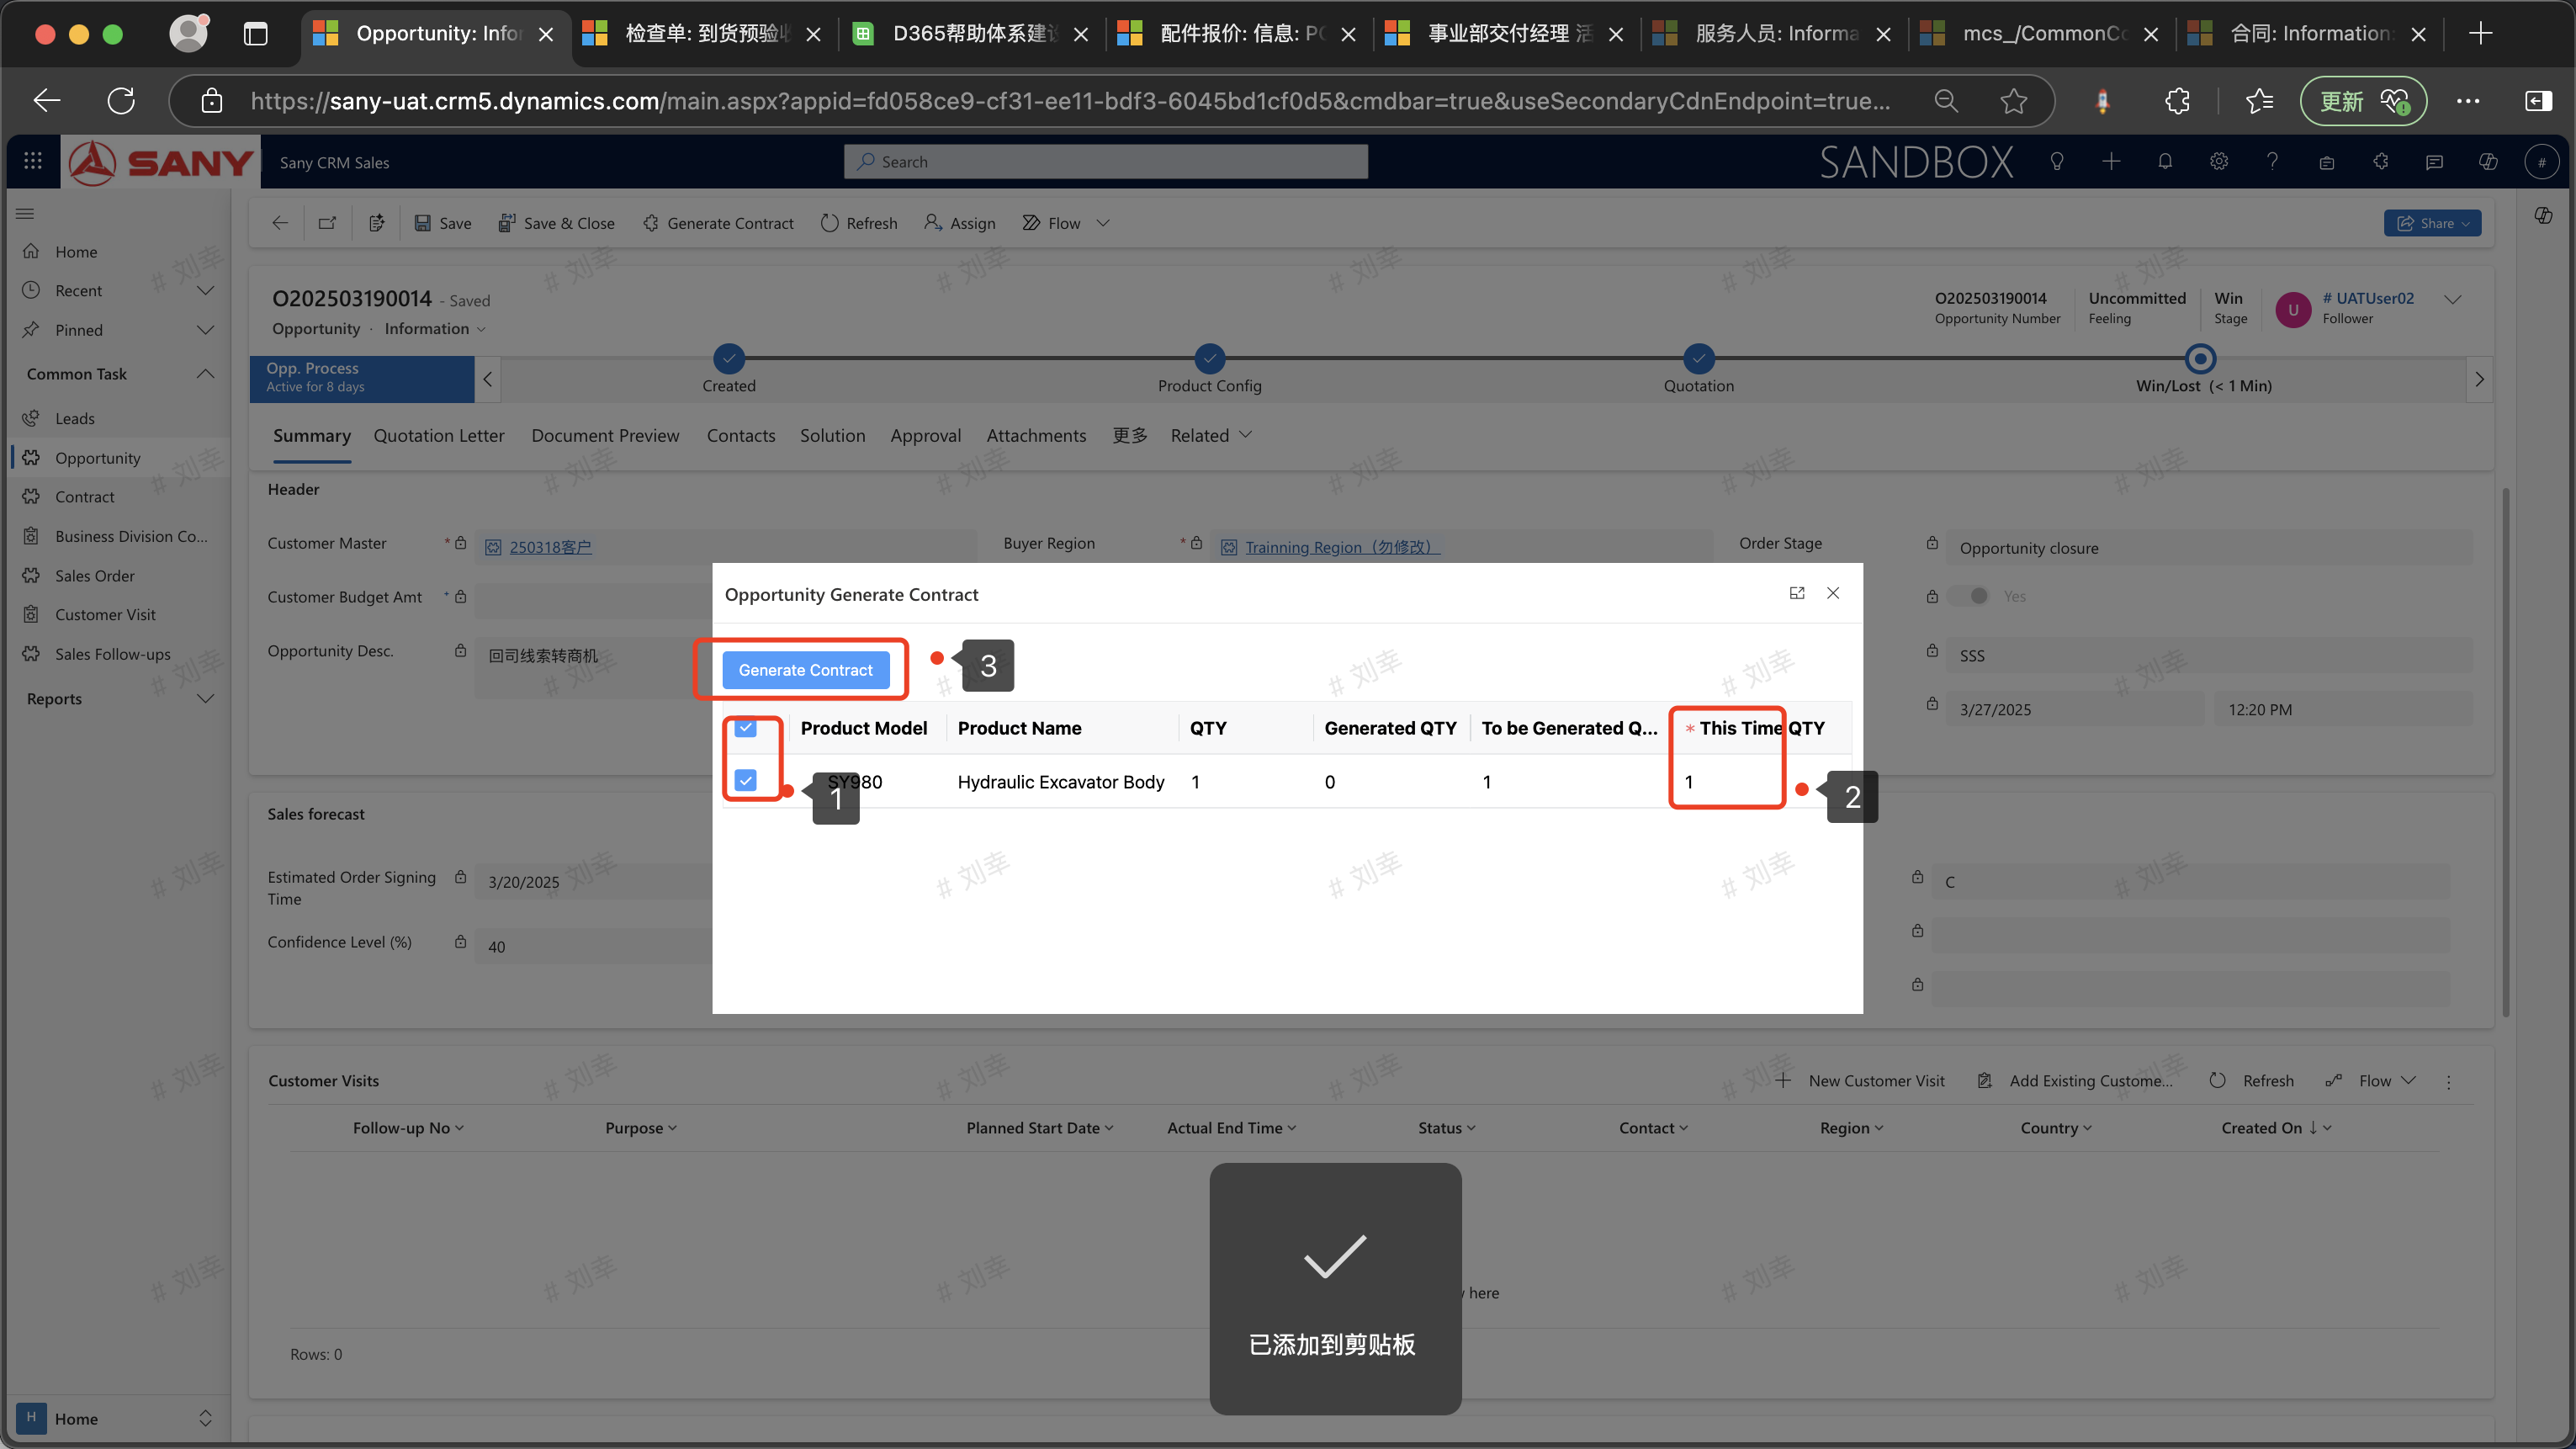
Entry Path: Business Opportunity -> Contracts to be Converted -> Open the business opportunity in the winning stage -> Click "Generate Contract", enter the quantity to be generated this time, and generate the contract.
Open the generated contract, and all fields with * are required to be filled.
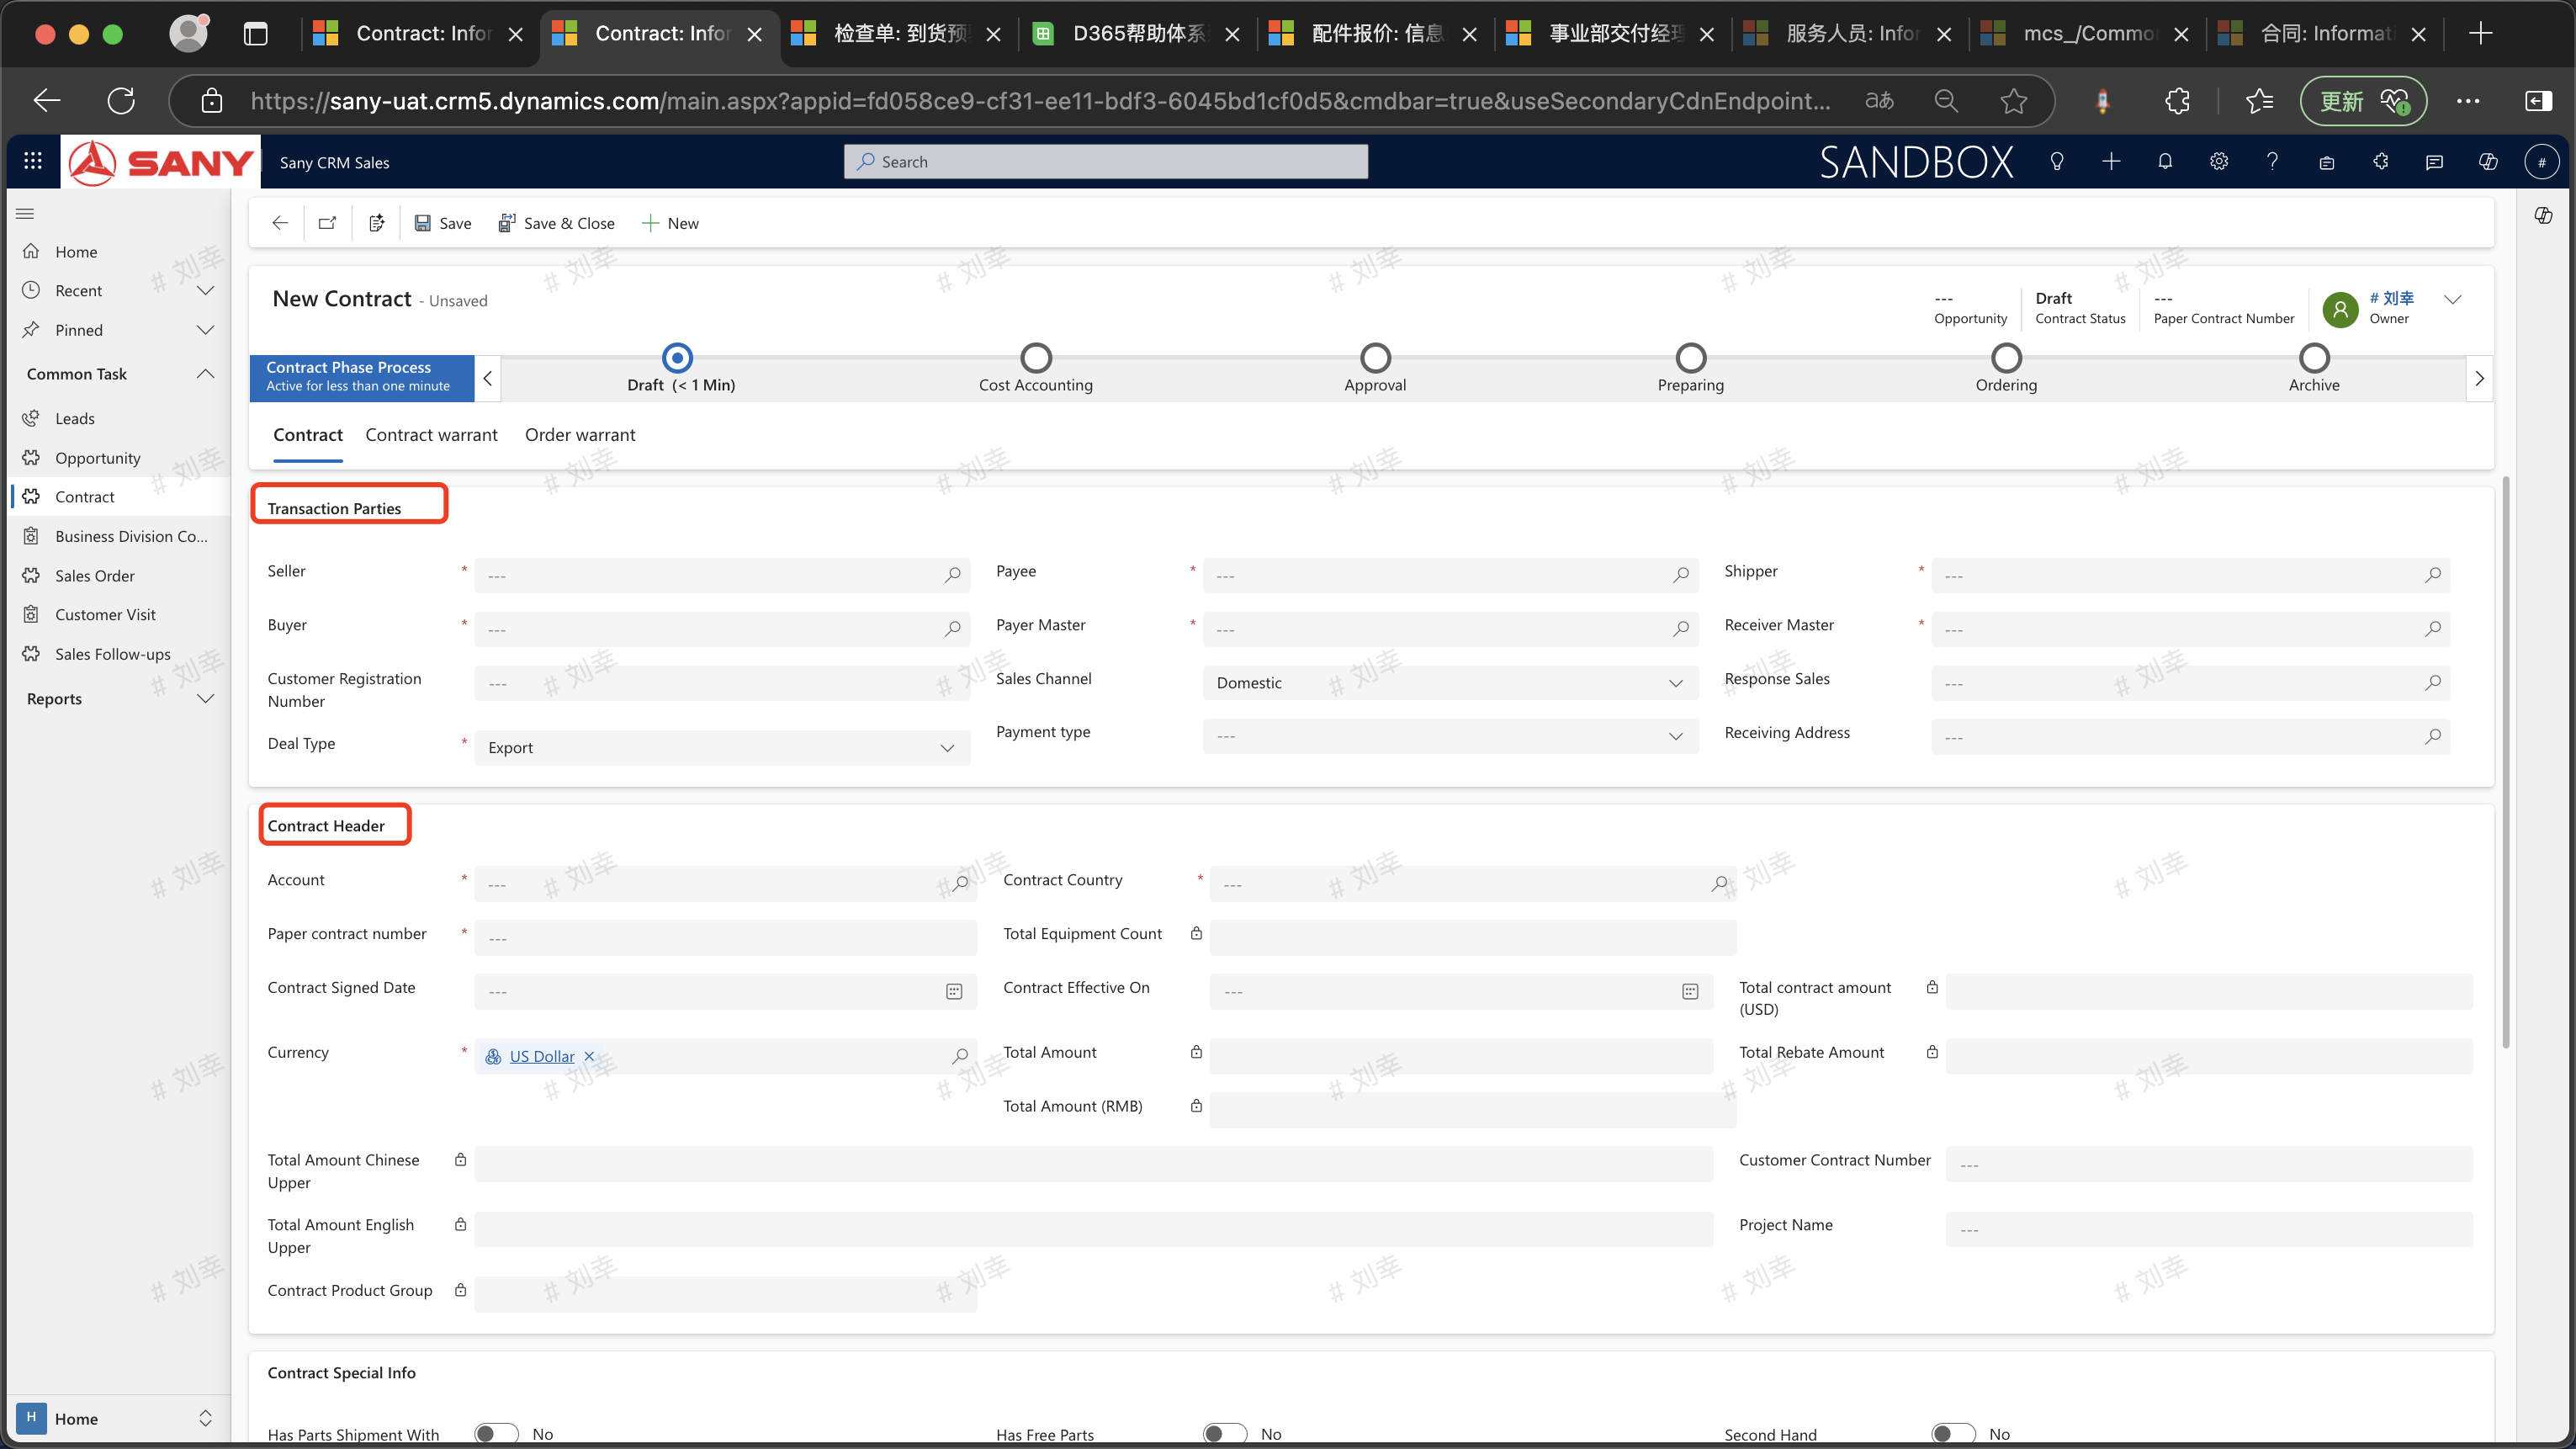
 Create a Prototype Contract
Maintain the trading parties (buyer and seller) in the contract, the country of sales destination, and the paper contract number. If the contract is generated from a business opportunity, enter the associated business
 Entry Path: Contract -> Related Parties -> Click and select "Award Category" -> Create New Related Party -> Fill in the required items marked with "*".
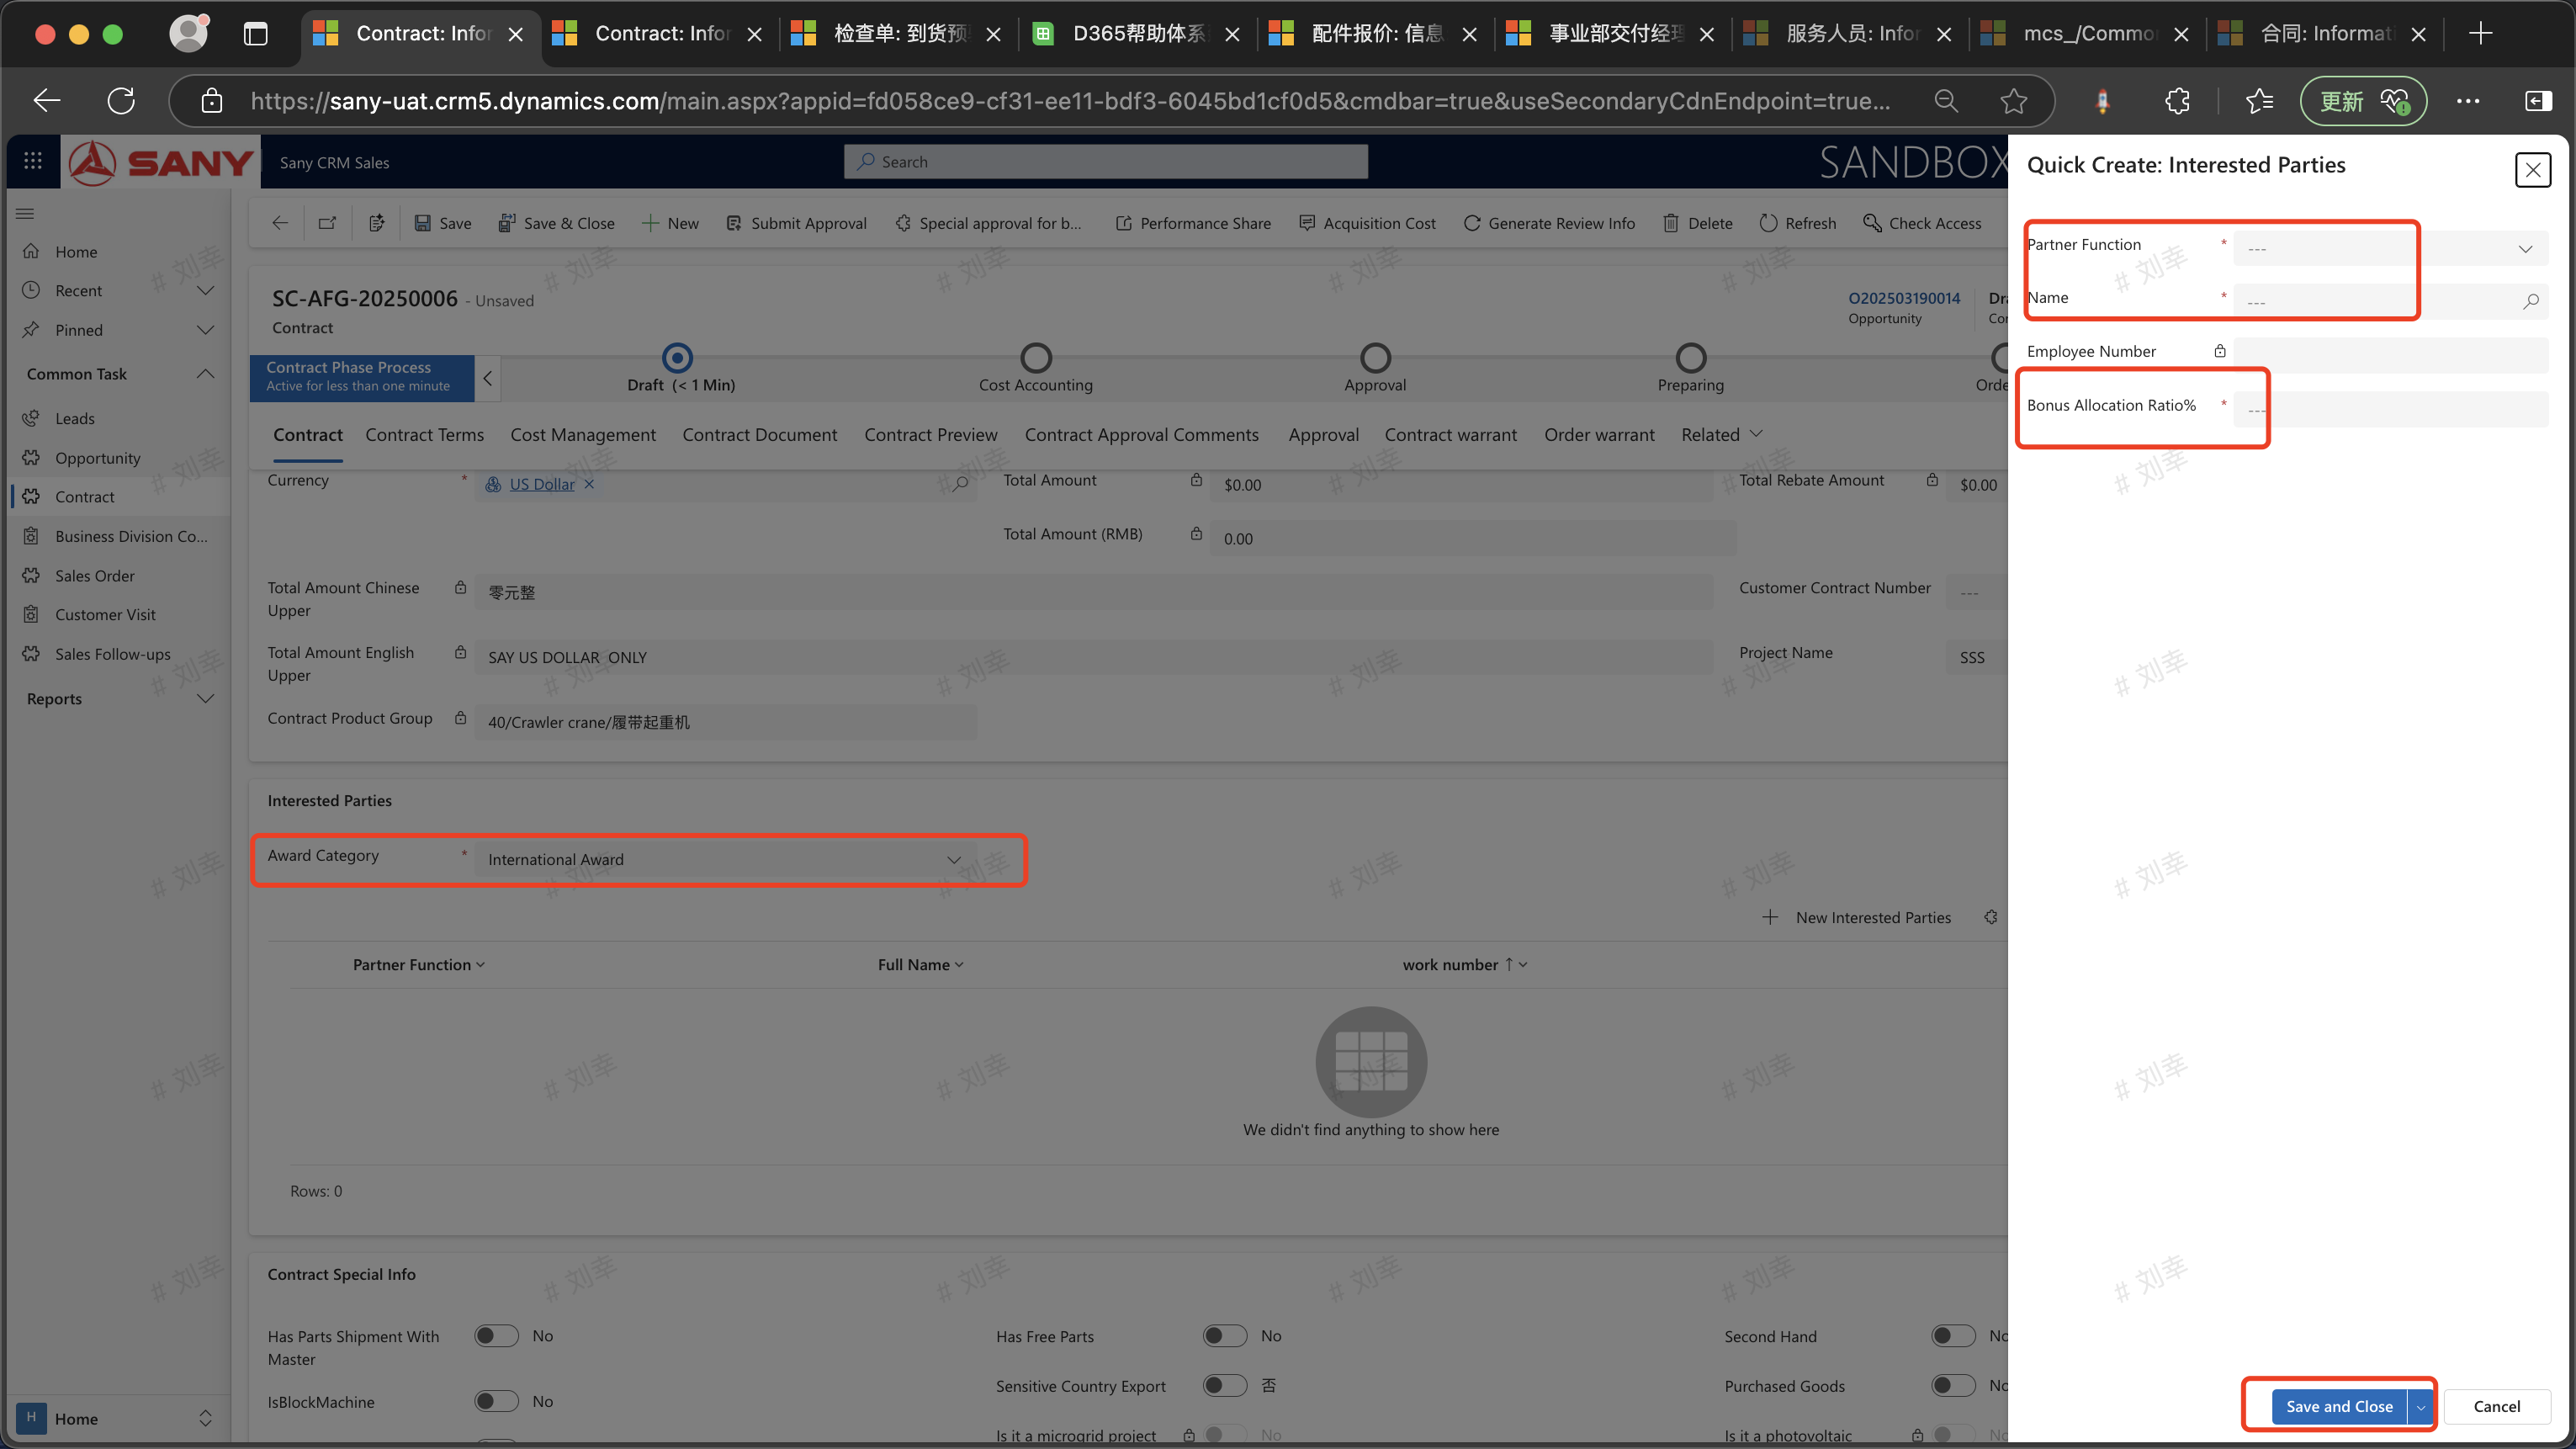
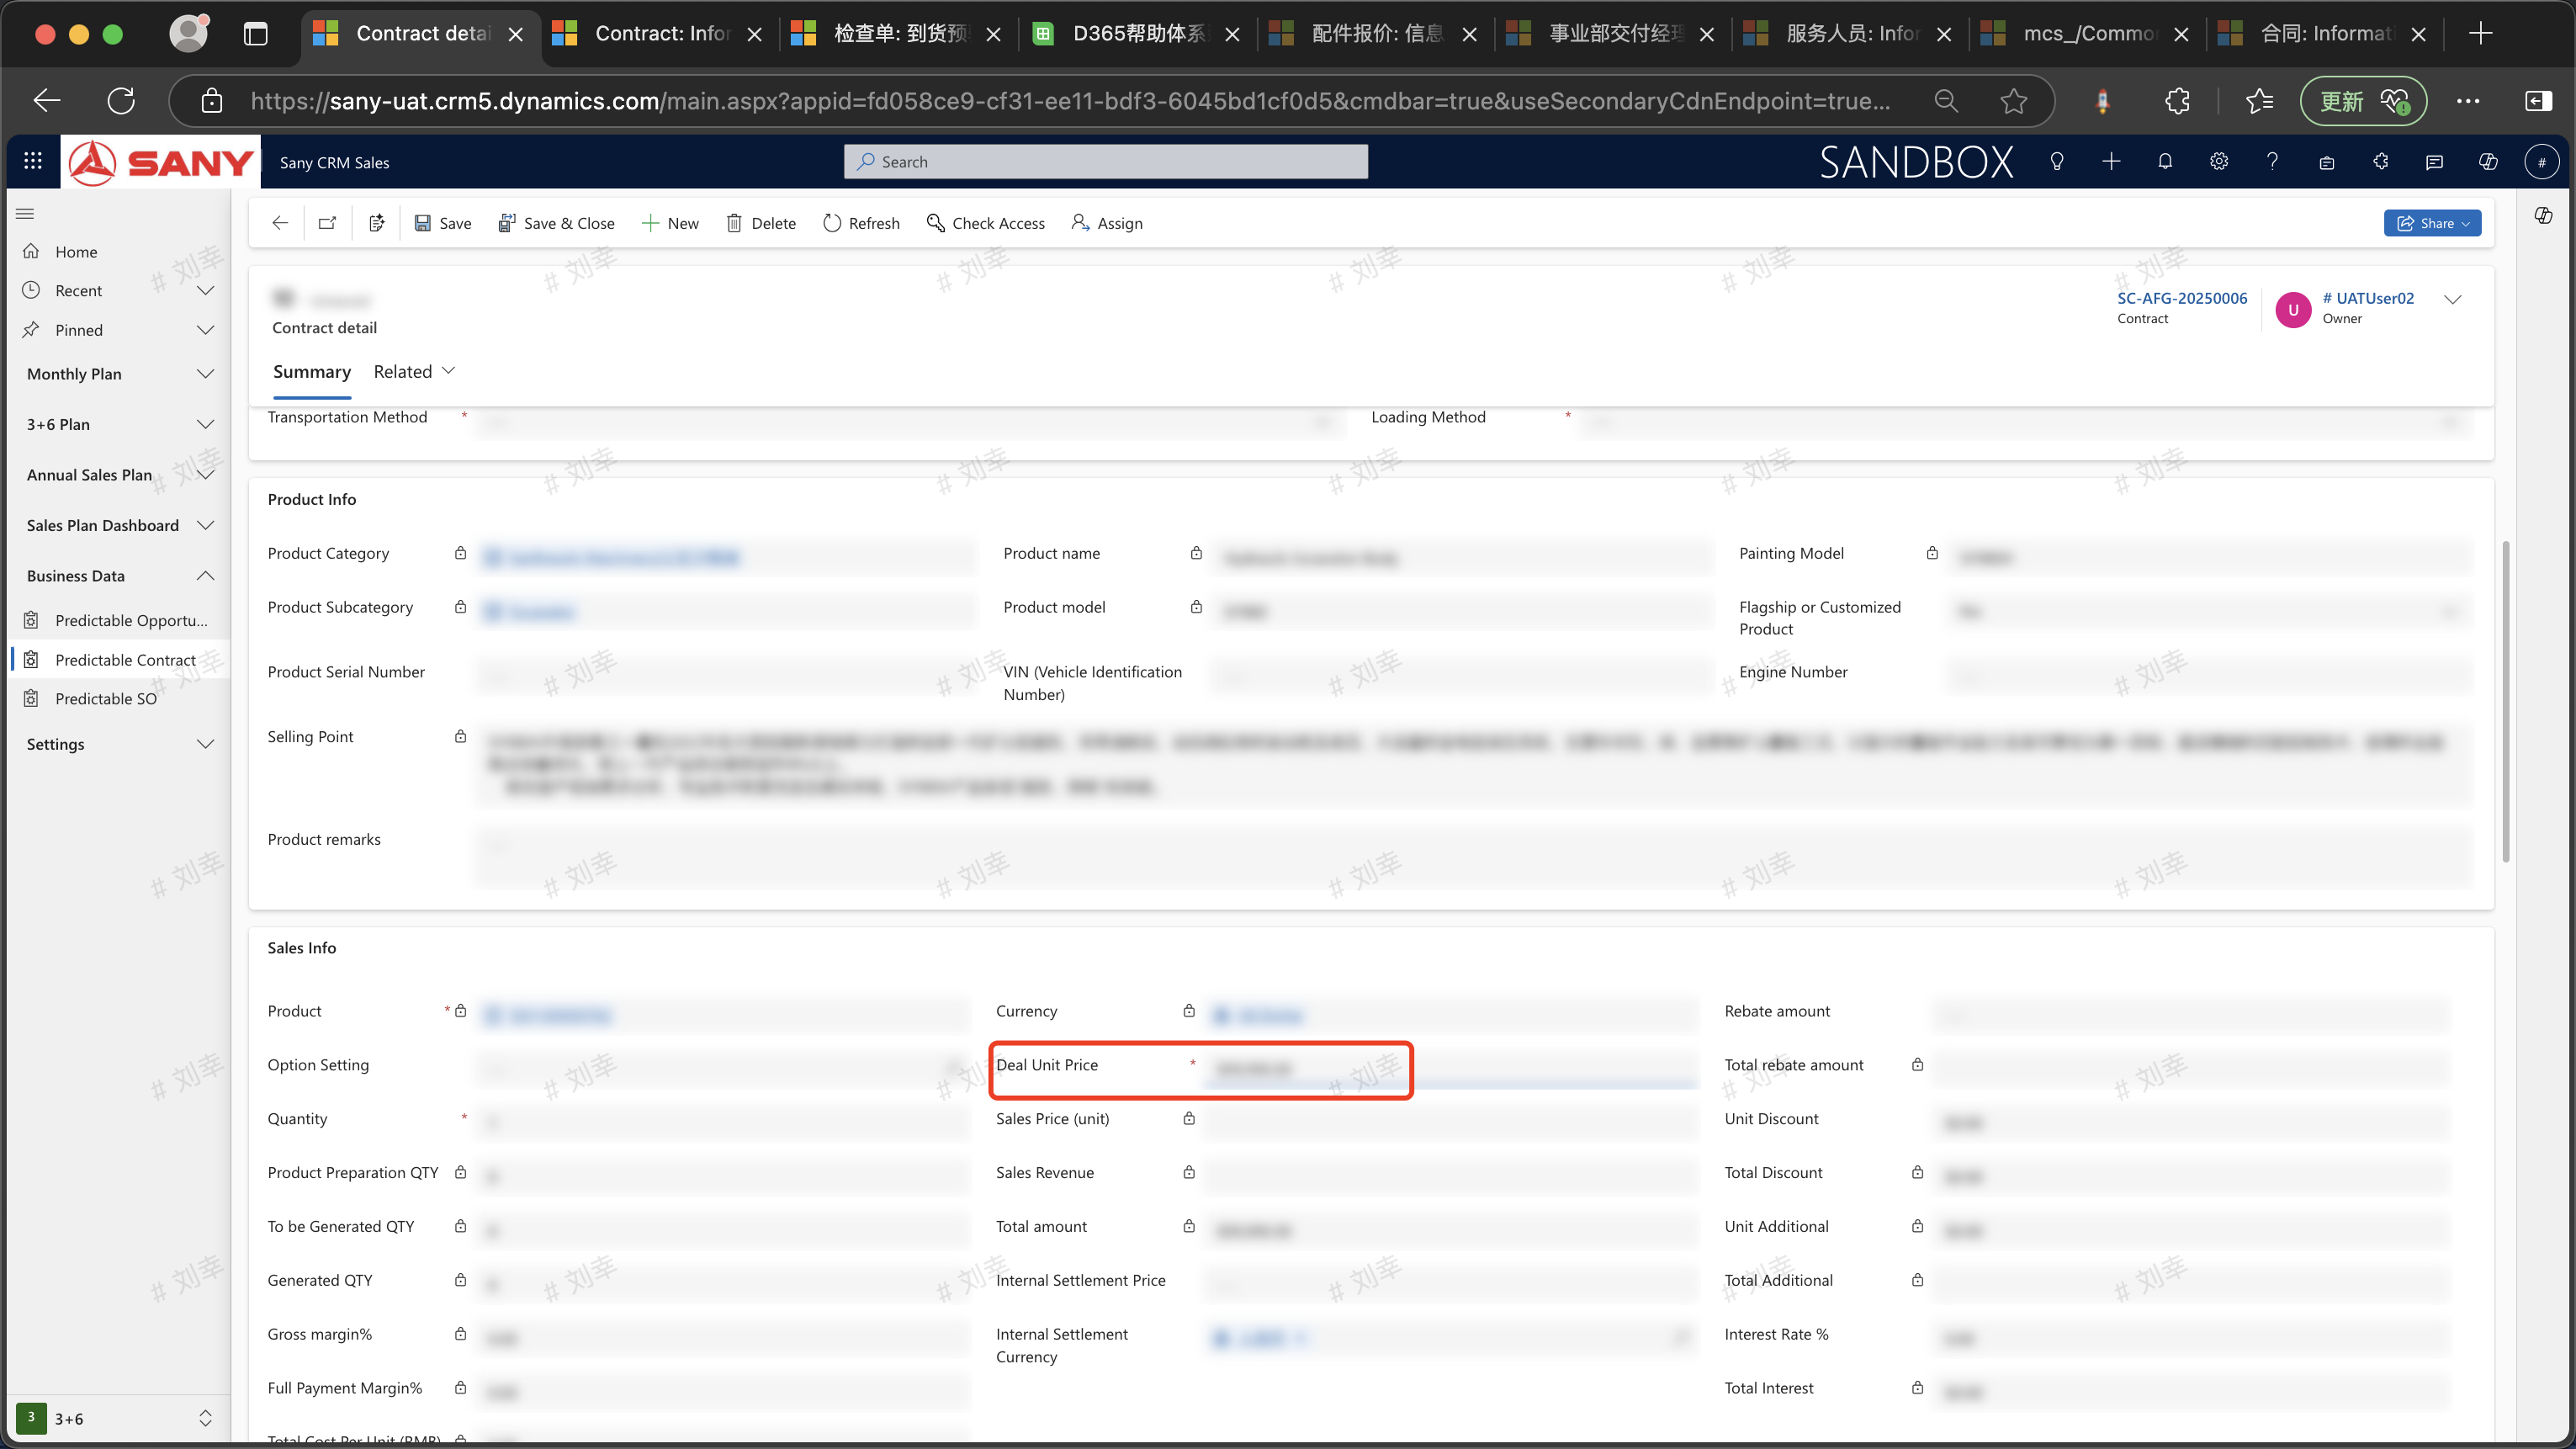
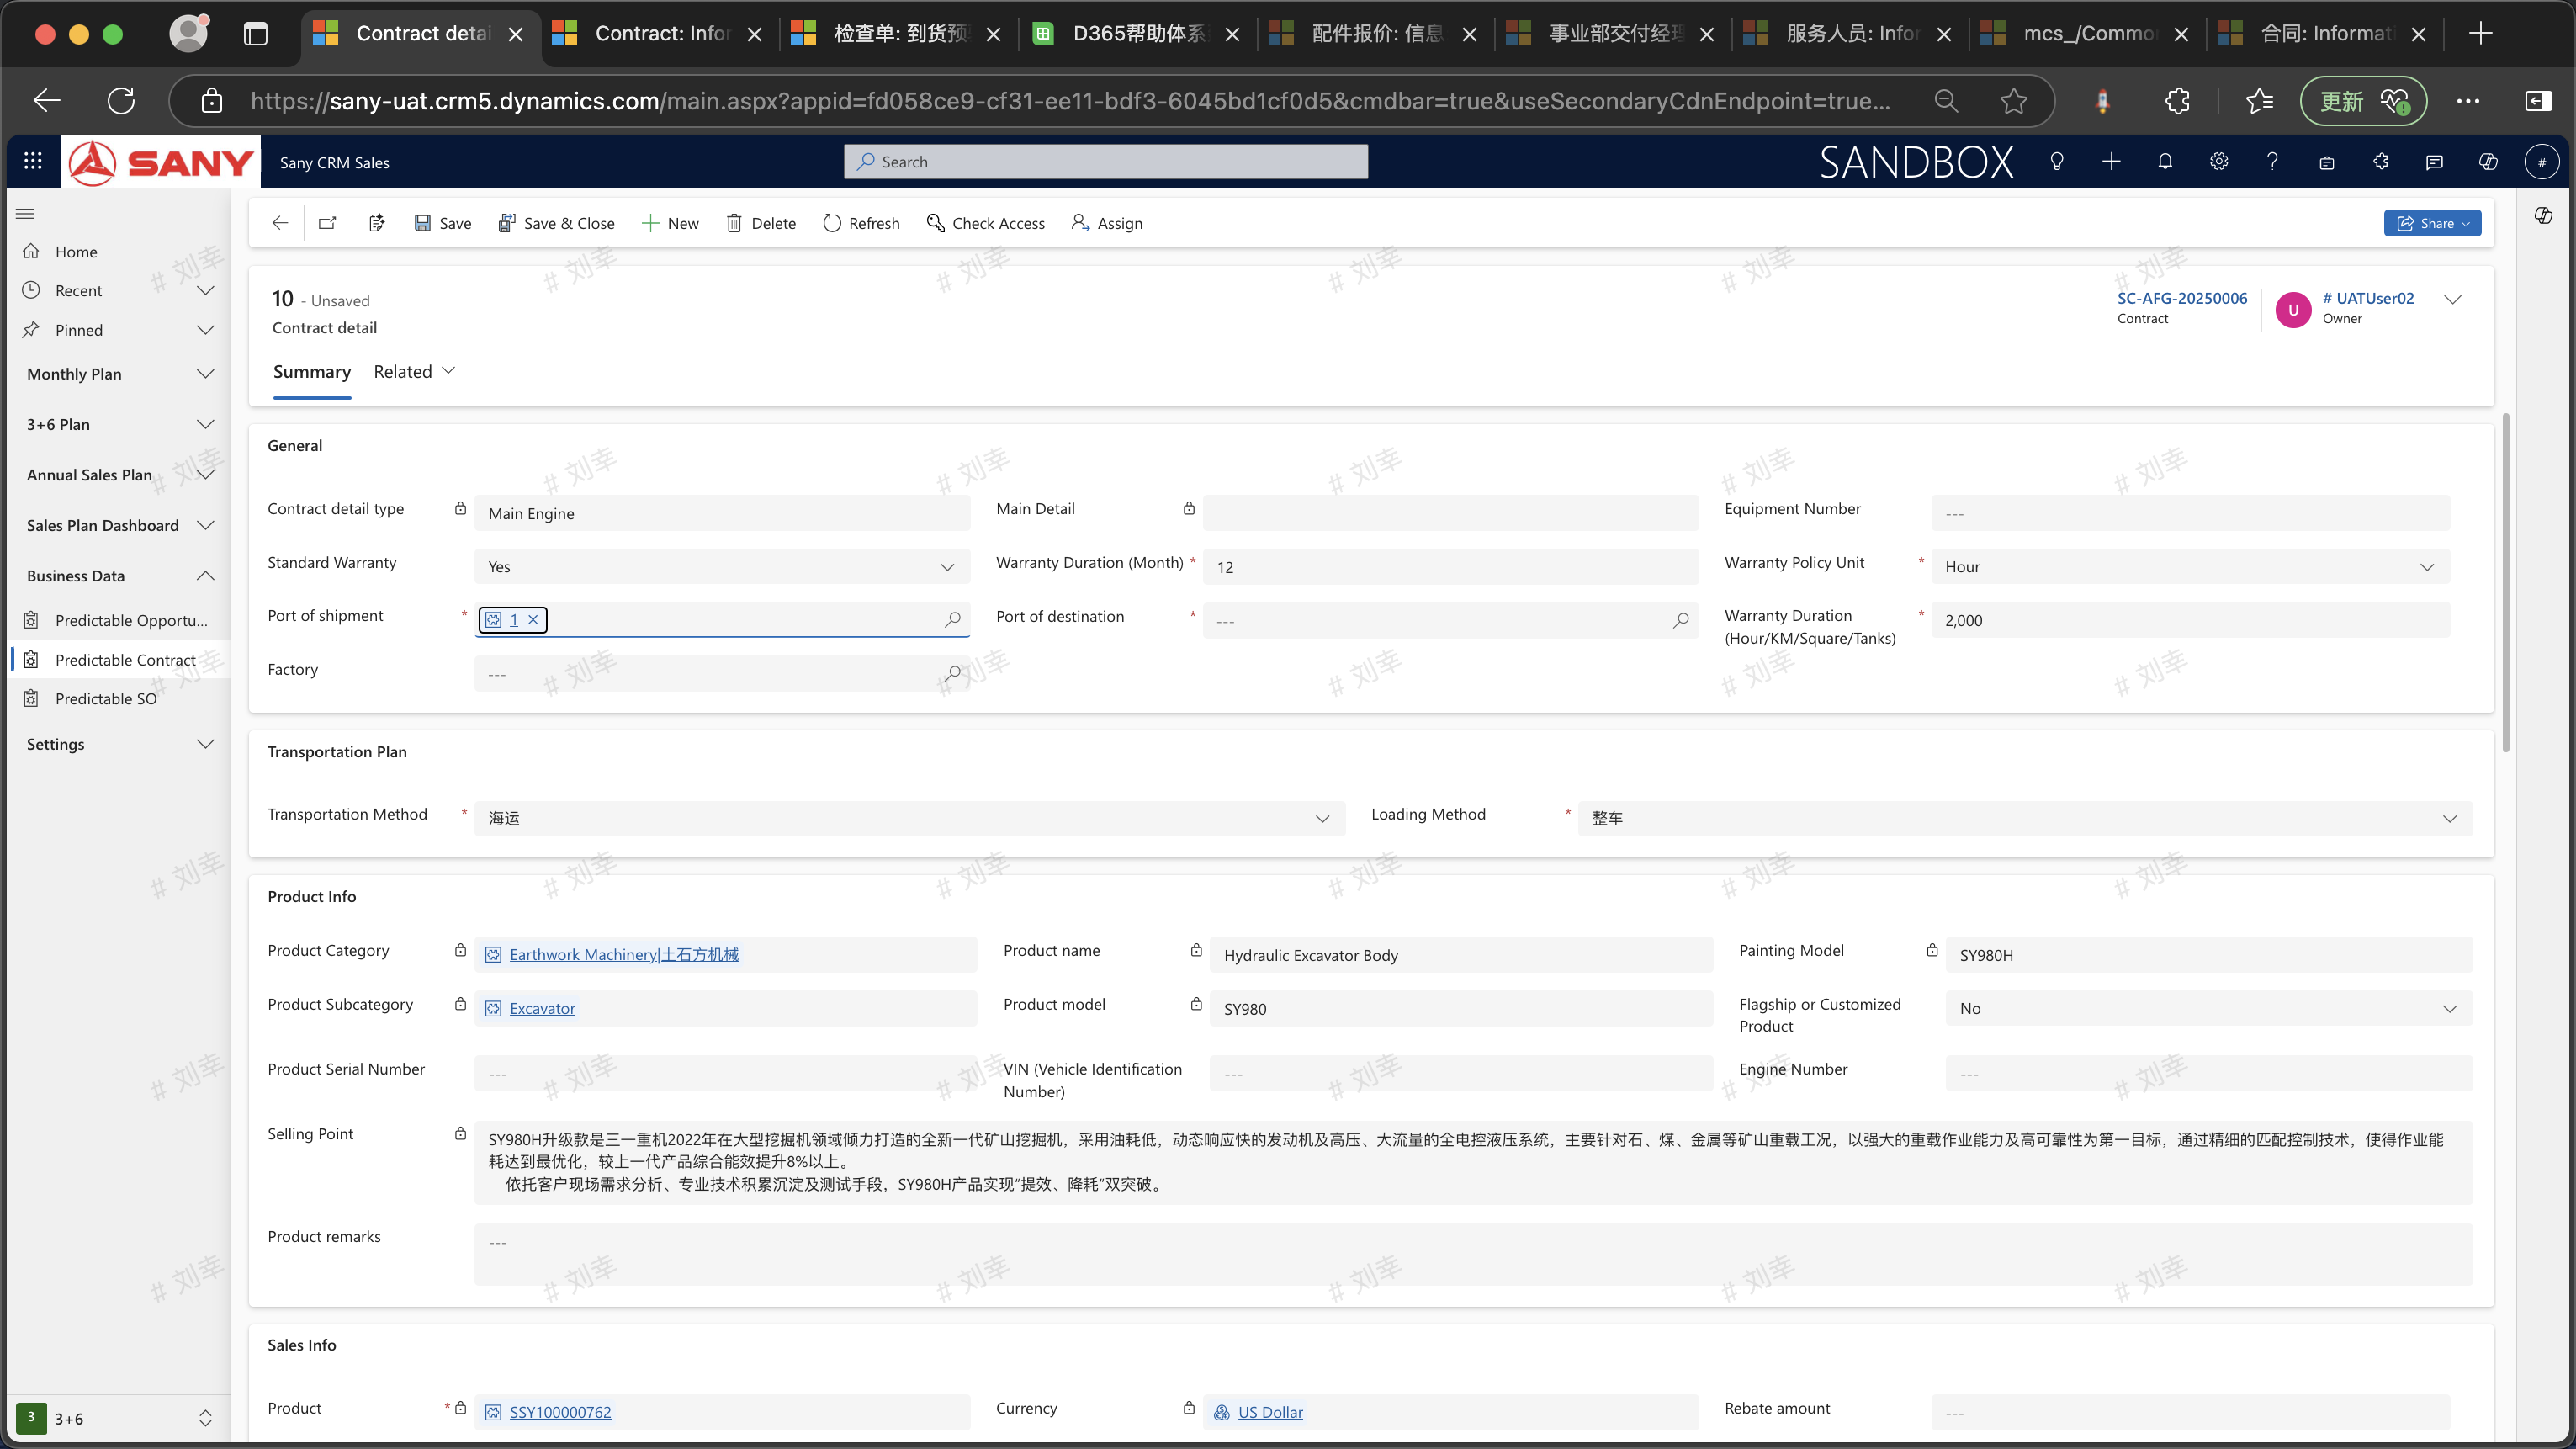
Entry Path:Contract -> Product Details -> Double-click or create a new item line -> Create New Related Party -> Fill in the required items marked with "*".
Click "+ Create New Contract Details", select a product, enter the [Quantity] and [Unit Price]. If it involves internal transactions, enter the [Internal Settlement Price]. Fill in the [Configuration Description] according to the actual situation. If there is nothing, directly fill in 'None' (because it is a required item), and then click "Save and Close".
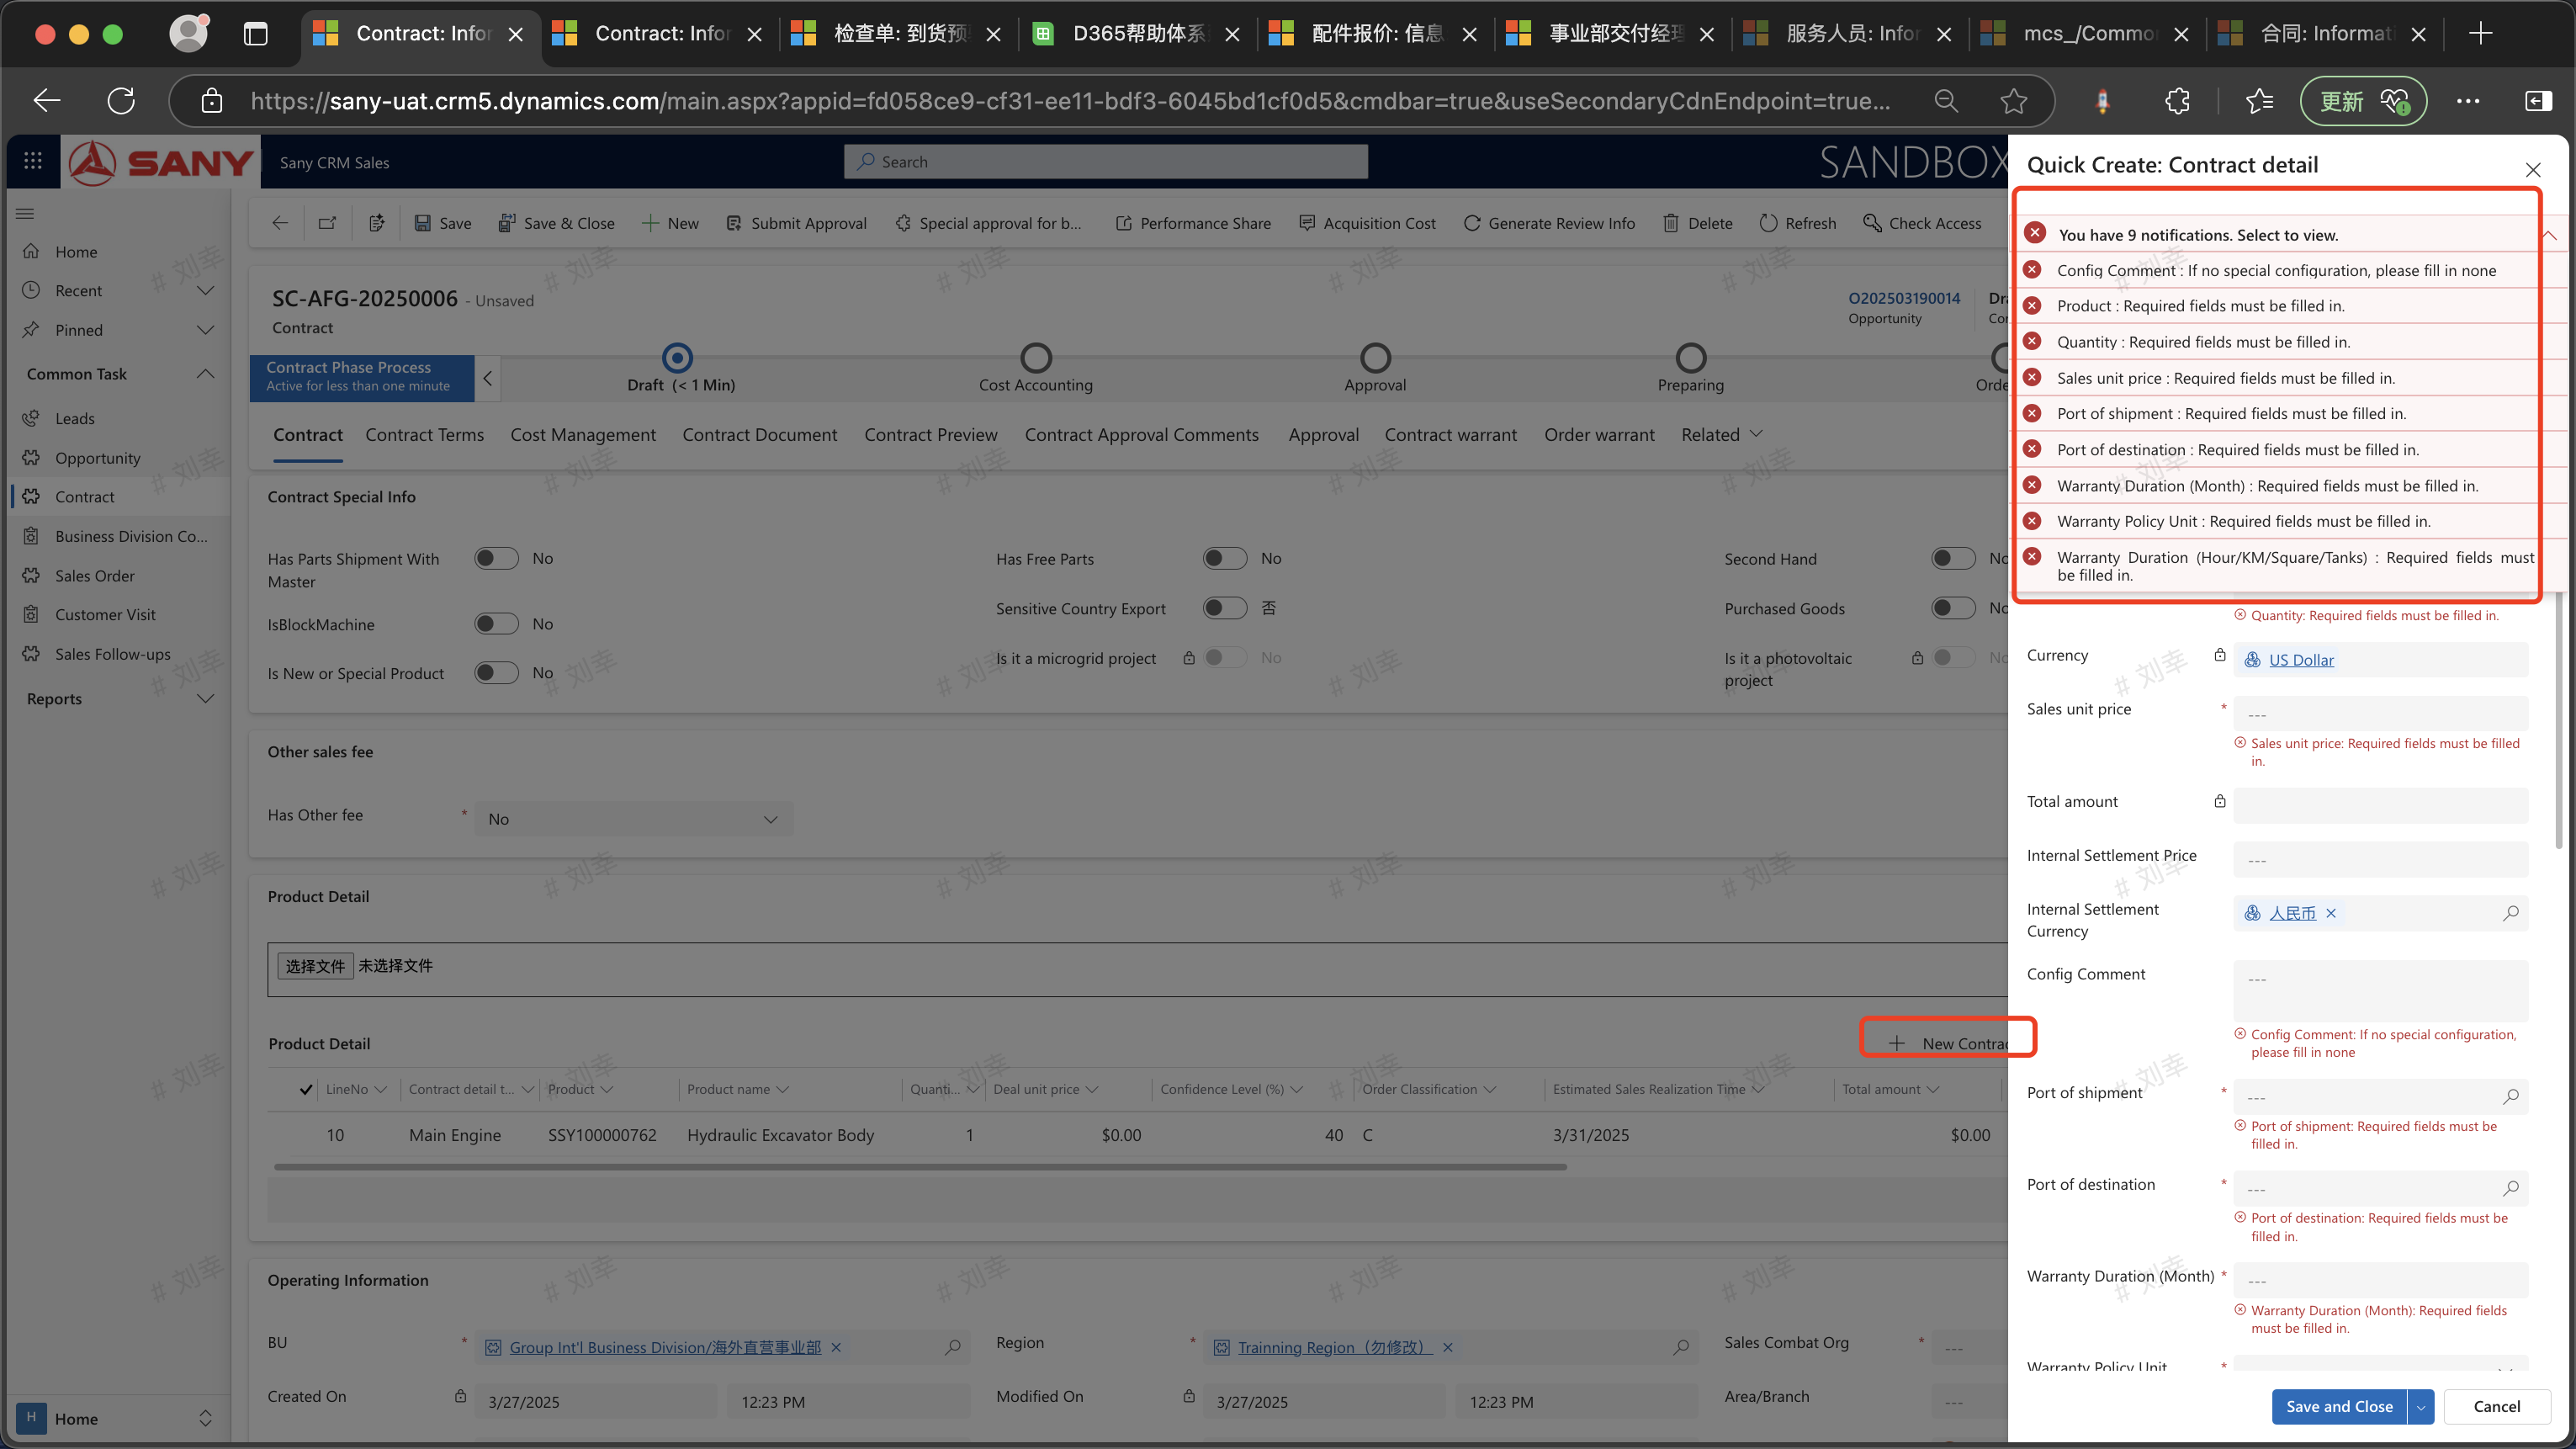
You can also double-click the contract product line to enter the product detail information and edit the sales unit price, quality assurance period, configuration description, etc.
Payment Terms
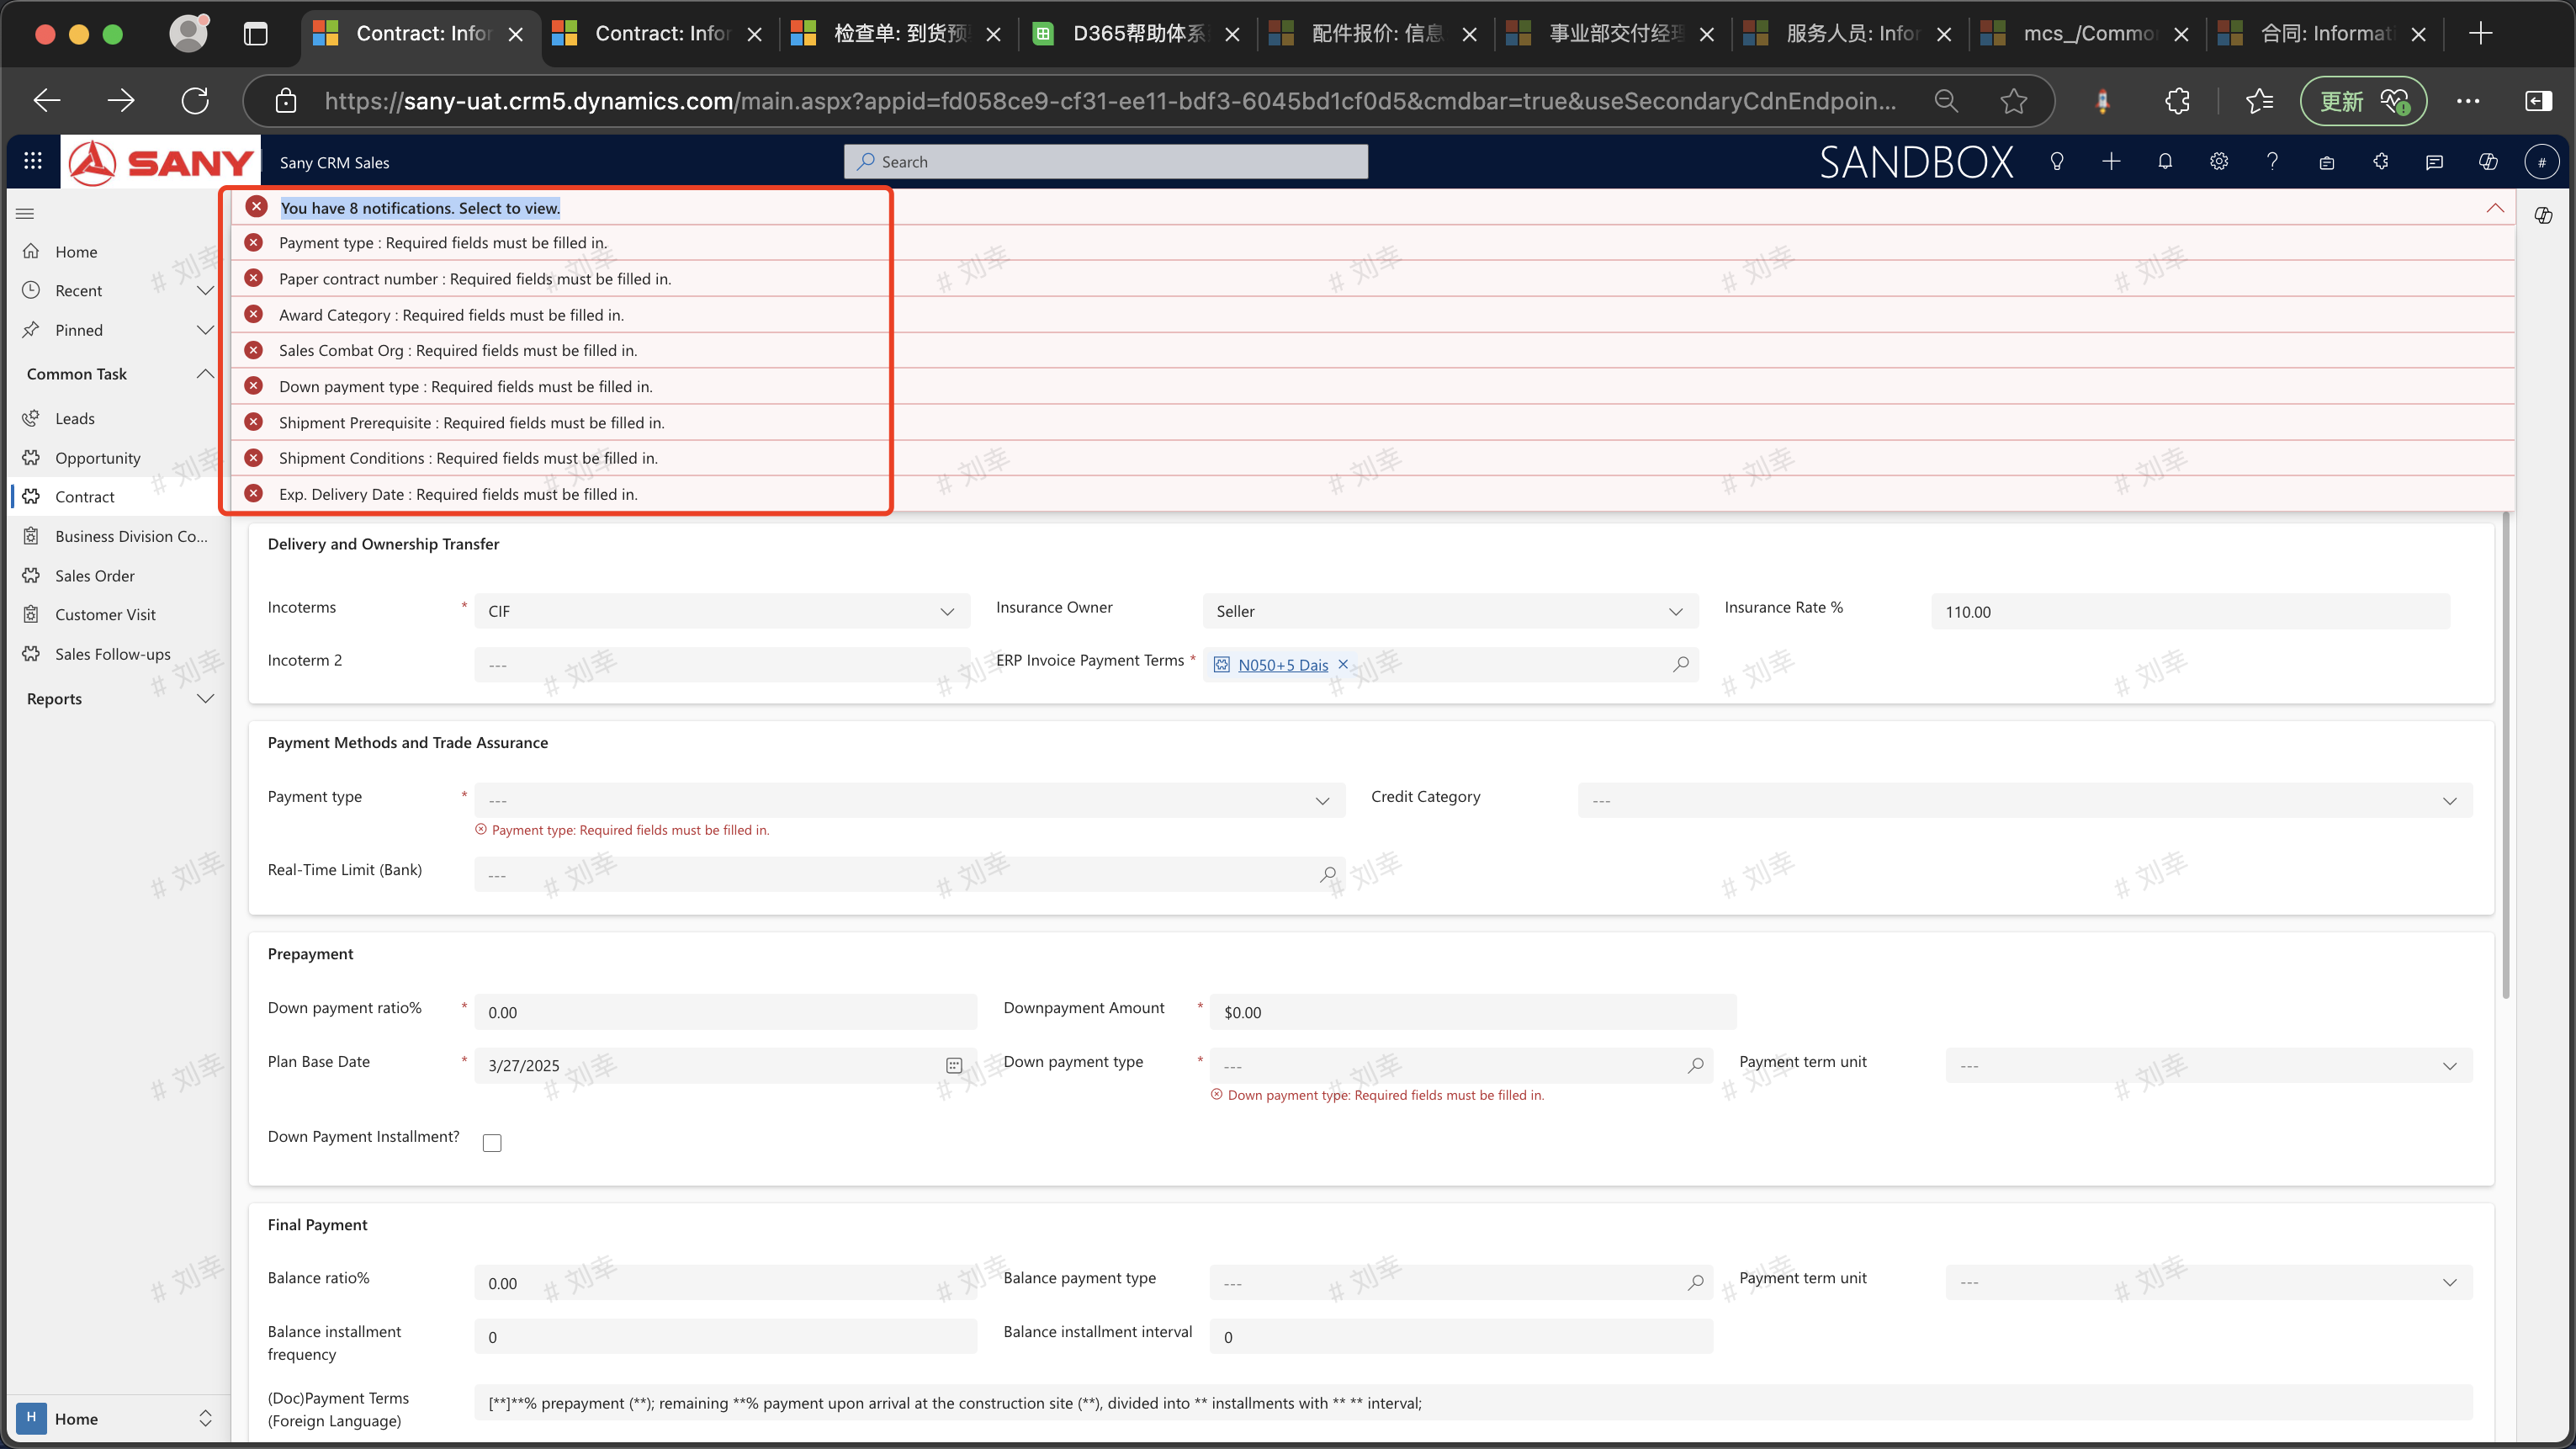
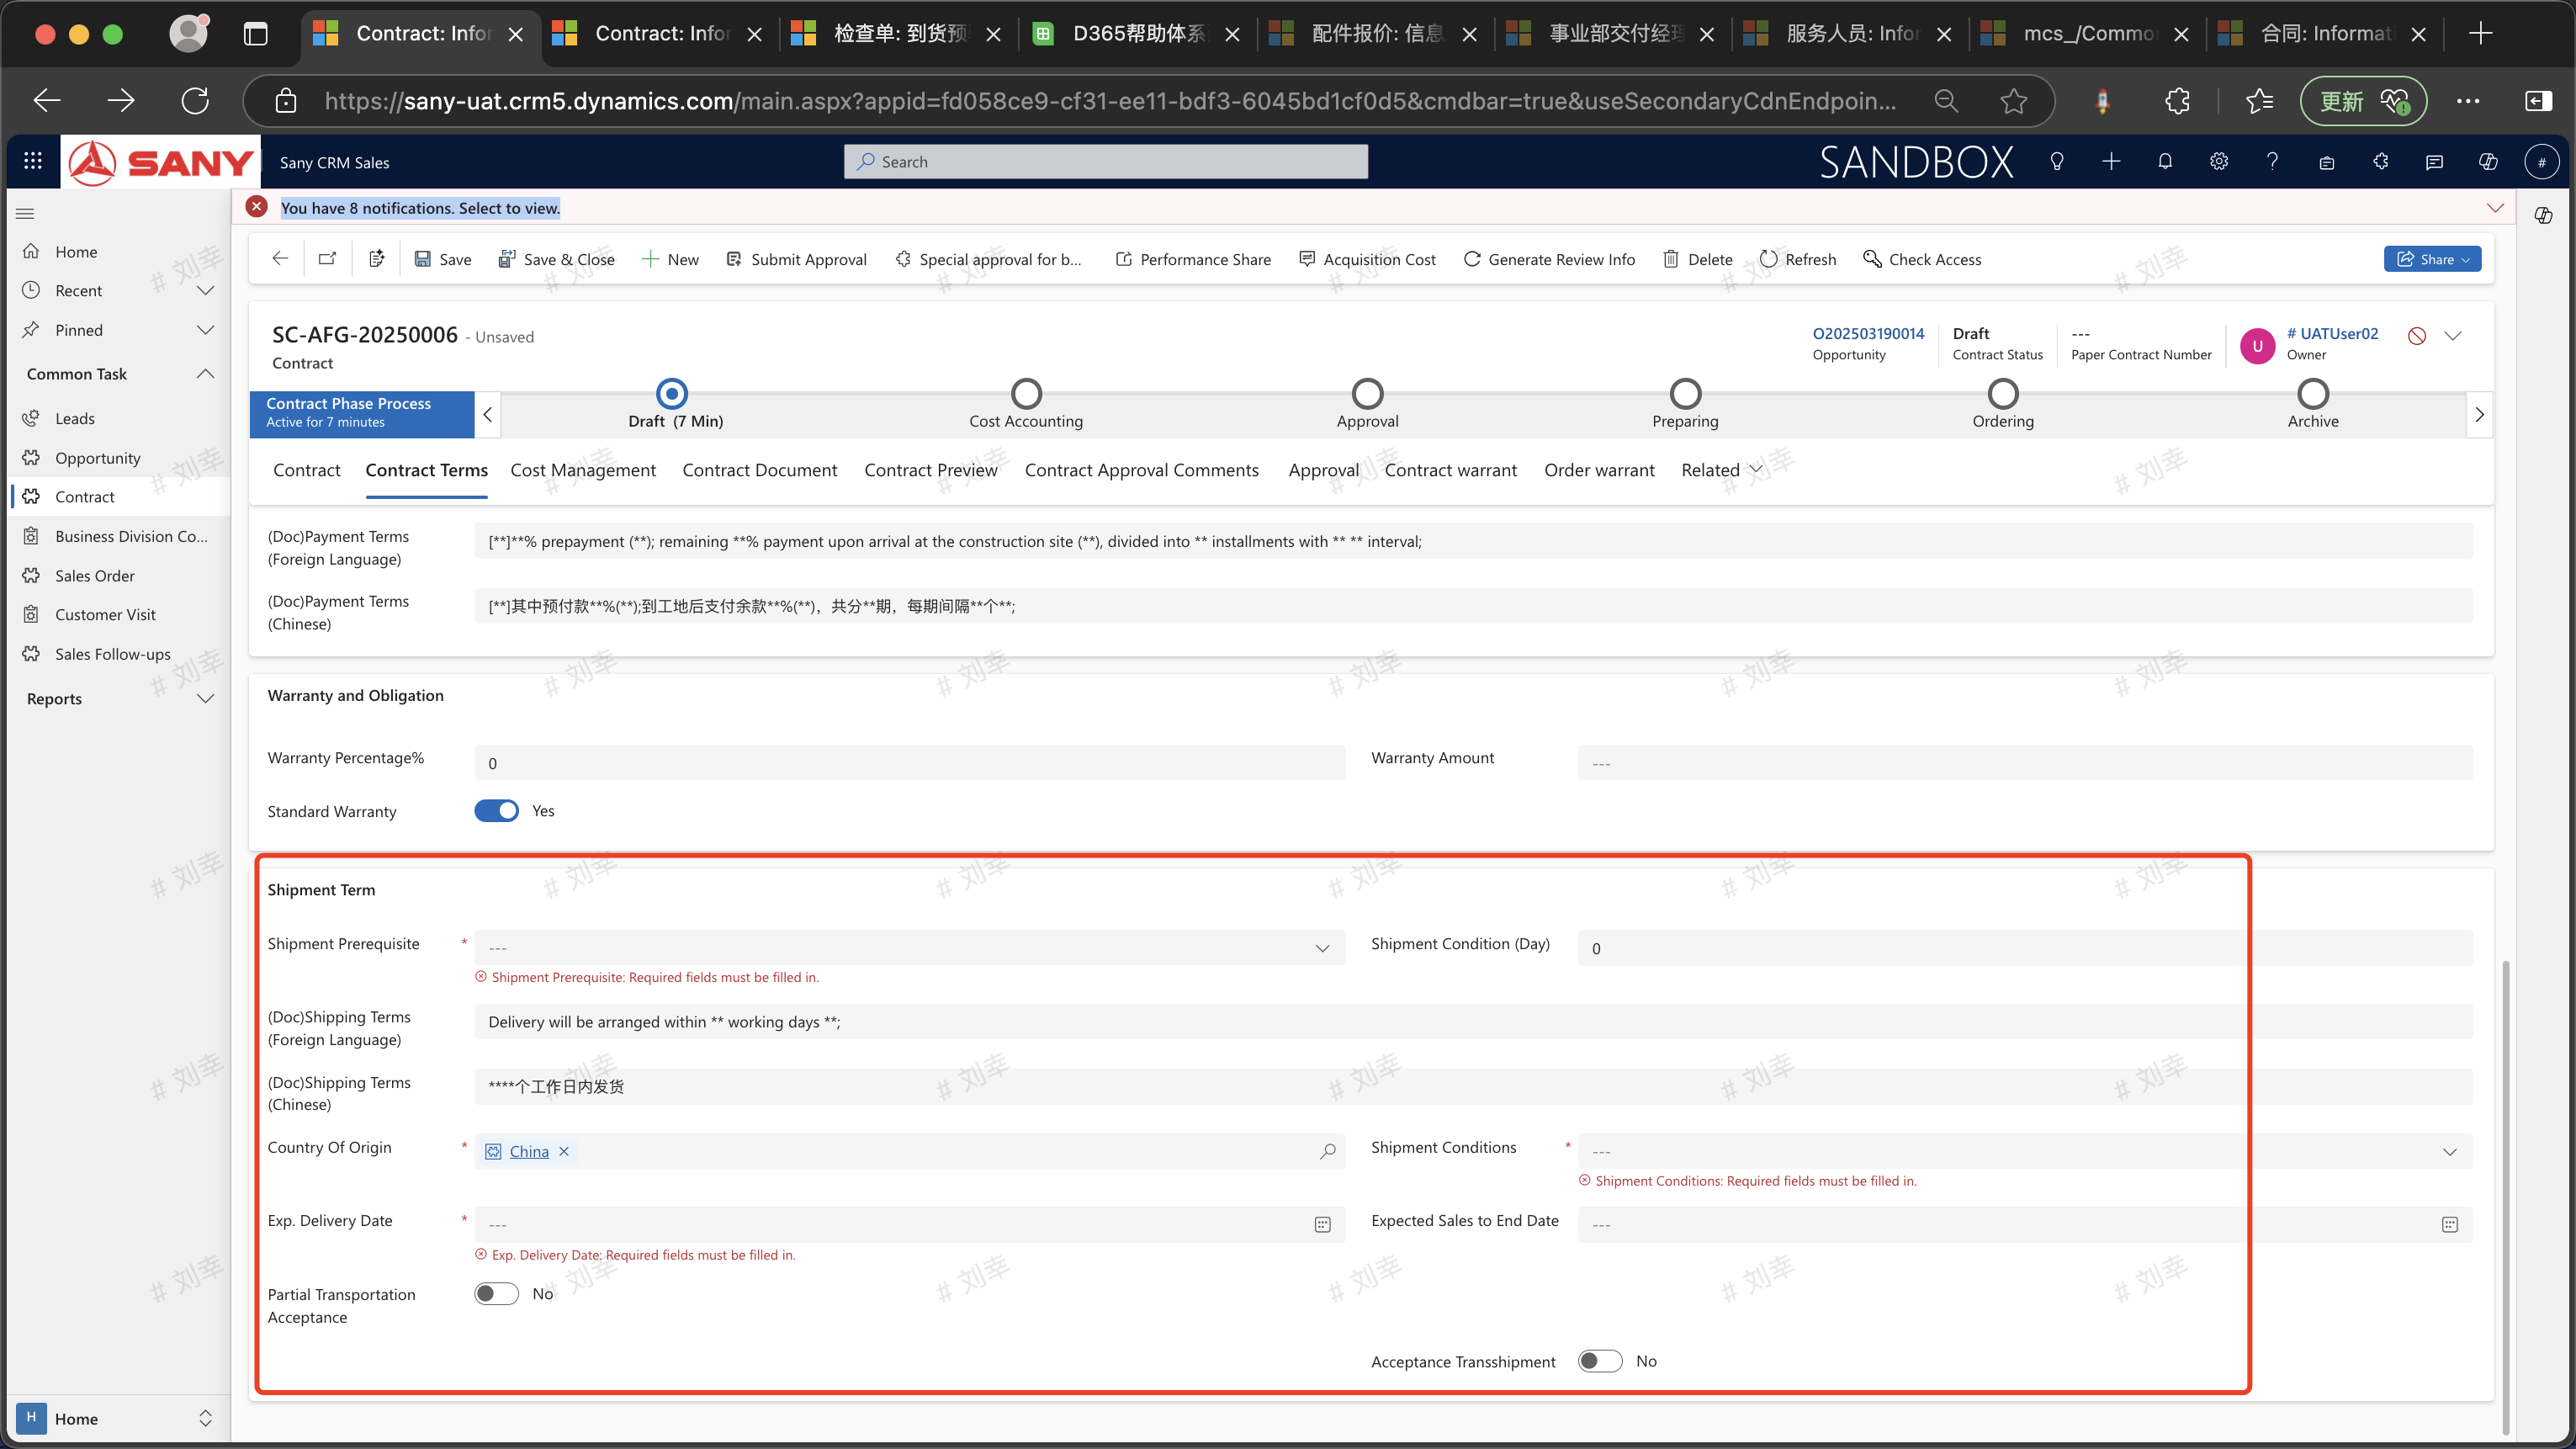
Enter the required fields in the contract terms of Delivery and Transfer of Ownership, Payment Method and Credit Insurance, and Shipping Terms: "Trade Terms", "Payment Type", "Preconditions for Shipment", "Country of Origin", "Estimated Delivery Date", and "Shipping Conditions".
After filling them out, click "Save".
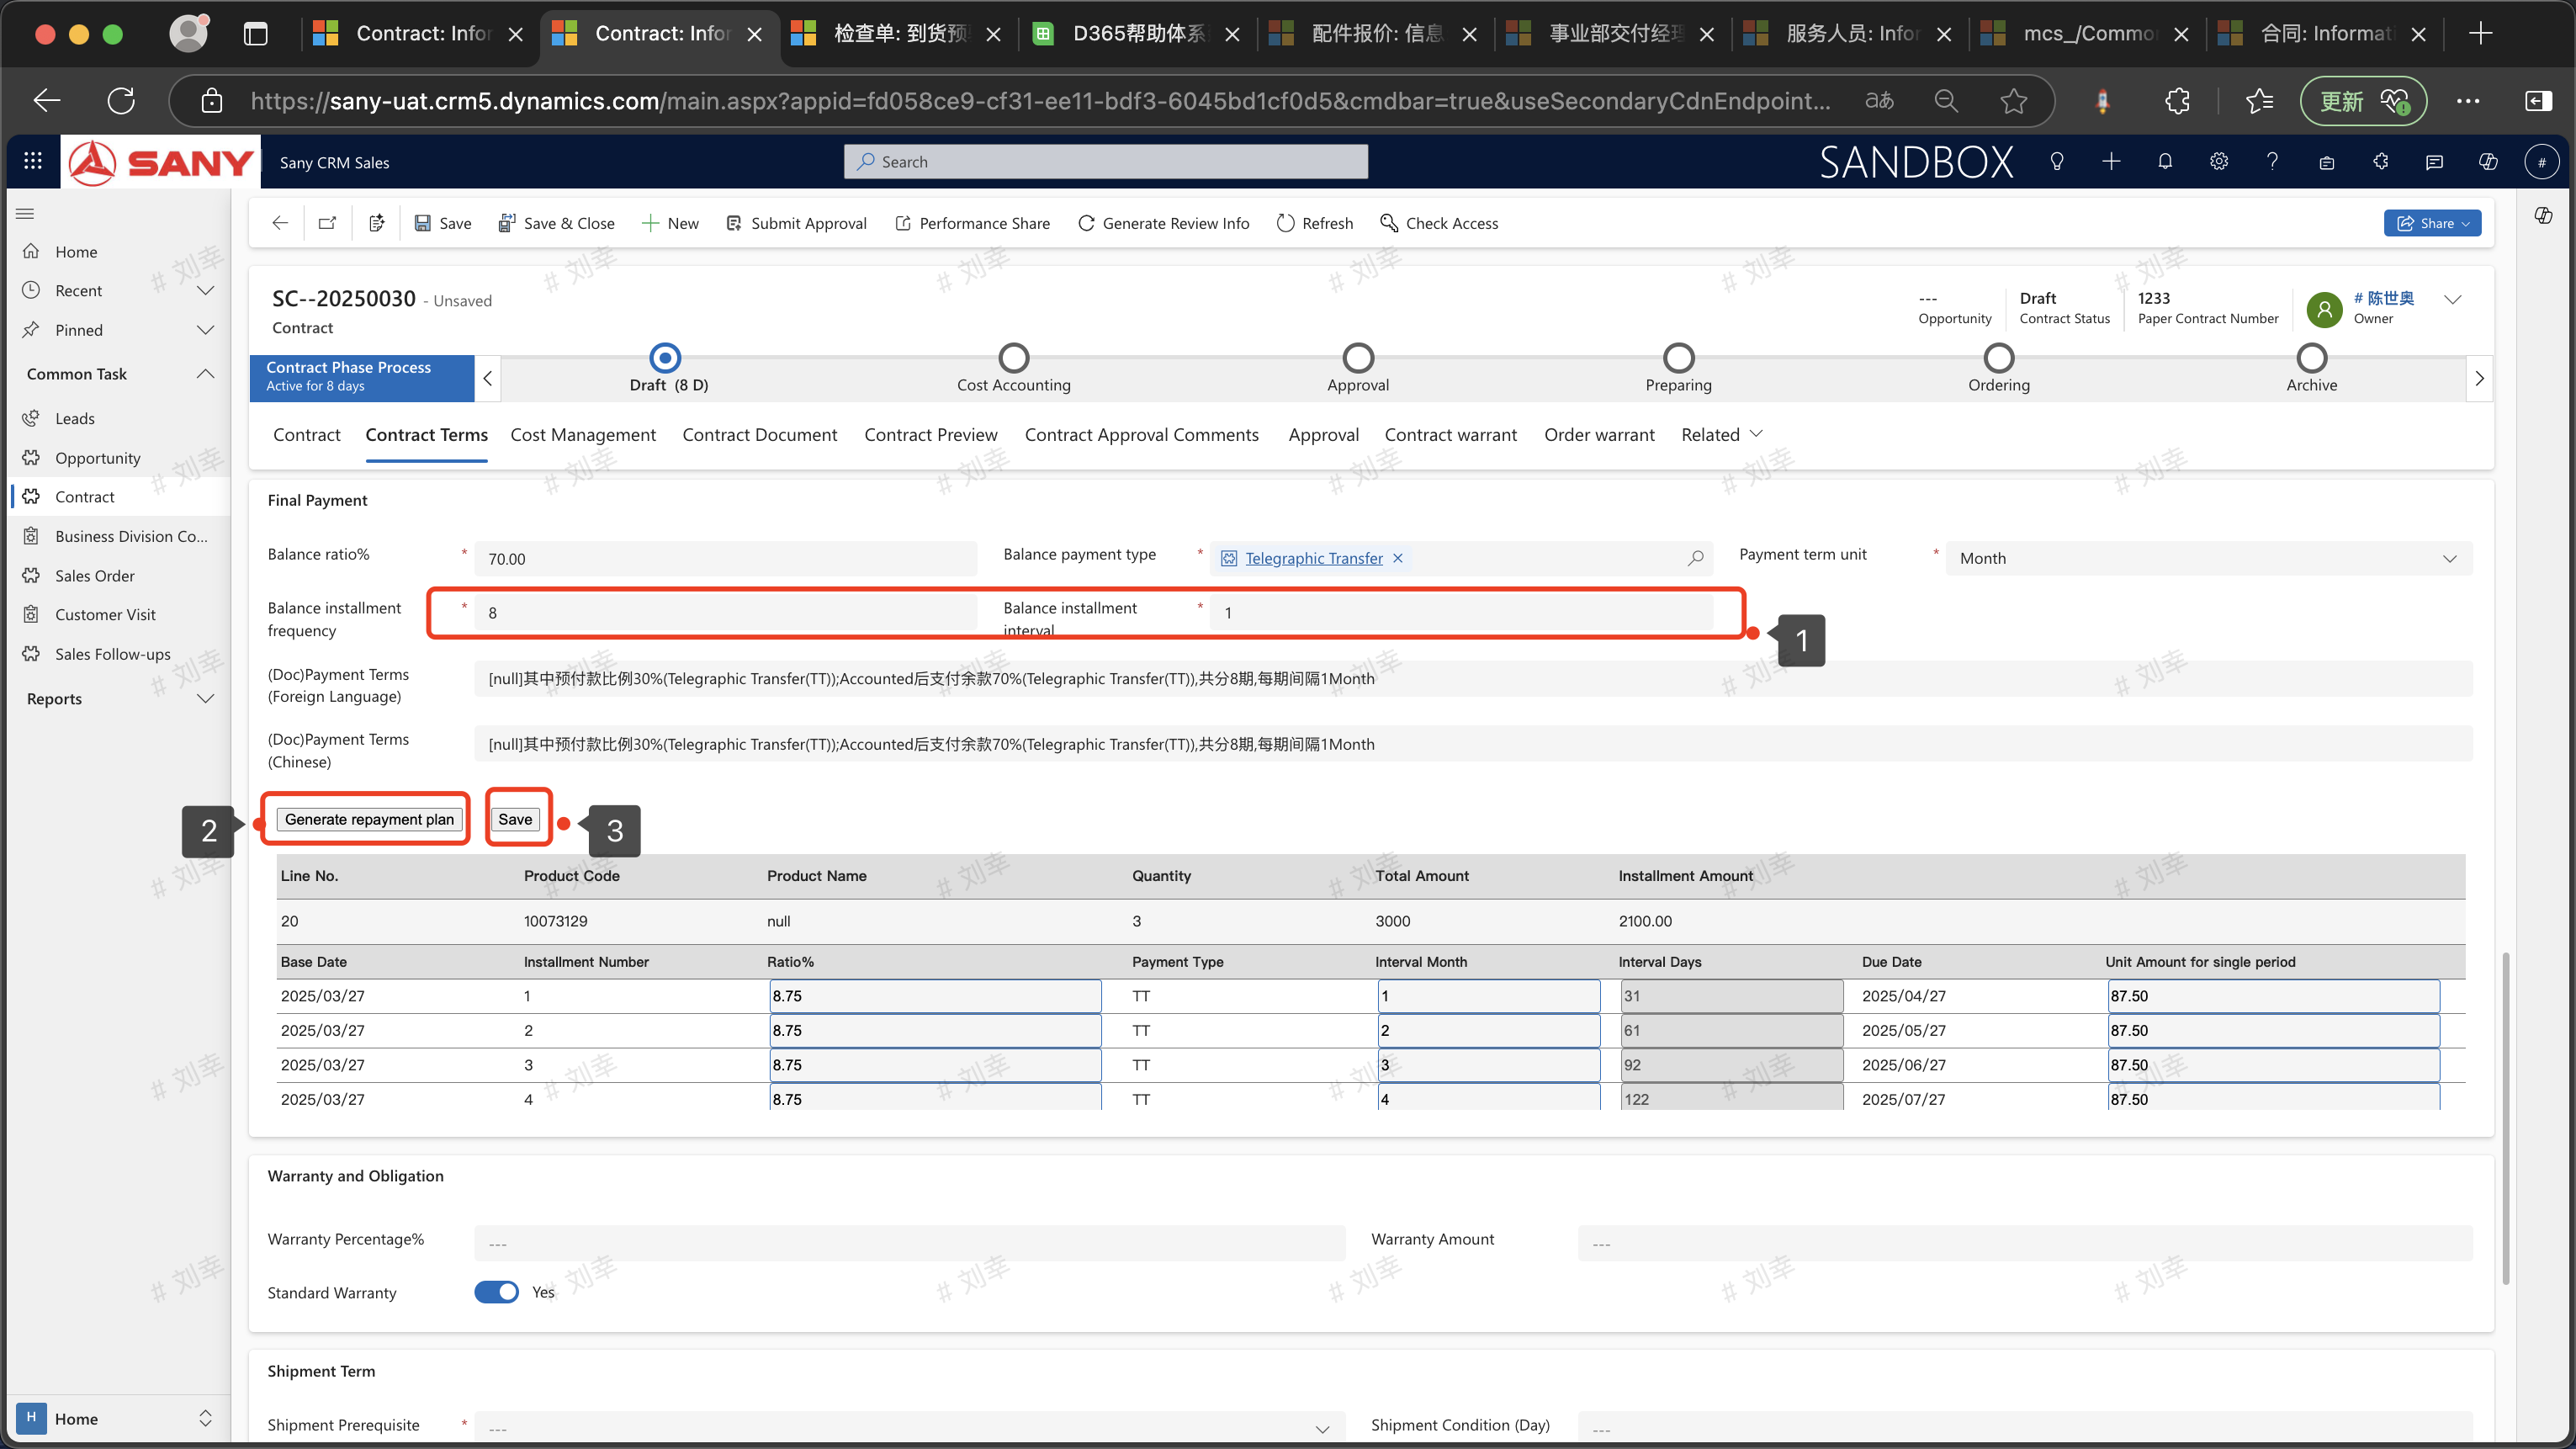
 In the Down Payment section of the contract, after entering the "Down Payment Method" and "Down Payment Ratio", click the "Generate Repayment Plan" button, and then click the save button.
Notes:
When filling in the down payment ratio, the down payment amount will be automatically populated. If the down payment amount is to be paid in installments, change "Is Down Payment Installment" to "Yes", and you can modify the "Down Payment Installment Frequency" and "Down Payment Installment Interval".
After generating the repayment plan, please click the "Save" button next to the "Generate Repayment Plan" button first.
In the Down Payment section of the contract, after entering the "Down Payment Method" and "Down Payment Ratio", click the "Generate Repayment Plan" button, and then click the save button.
Notes:
When filling in the down payment ratio, the down payment amount will be automatically populated. If the down payment amount is to be paid in installments, change "Is Down Payment Installment" to "Yes", and you can modify the "Down Payment Installment Frequency" and "Down Payment Installment Interval".
After generating the repayment plan, please click the "Save" button next to the "Generate Repayment Plan" button first.
 Generate the repayment plan for the installment payments, and enter the "Remaining Amount Ratio", "Number of Installment Periods for the Remaining Amount", and "Interval between Installments of the Remaining Amount".
Note 1: You can change the ratio in the repayment plan for the remaining amount to change the installment amount.
Note 2: When the unit of the payment condition is "Monthly", changing the interval in months to modify the repayment due date is not supported. The repayment due date is determined by the "Number of Installment Periods for the Remaining Amount" and "Interval between Installments of the Remaining Amount" in the Remaining Amount.
Note 3: When the unit of the payment condition is "Designated Repayment Date", you can modify the "Due Date" and "Interval in months" to change the repayment due date.
Generate the repayment plan for the installment payments, and enter the "Remaining Amount Ratio", "Number of Installment Periods for the Remaining Amount", and "Interval between Installments of the Remaining Amount".
Note 1: You can change the ratio in the repayment plan for the remaining amount to change the installment amount.
Note 2: When the unit of the payment condition is "Monthly", changing the interval in months to modify the repayment due date is not supported. The repayment due date is determined by the "Number of Installment Periods for the Remaining Amount" and "Interval between Installments of the Remaining Amount" in the Remaining Amount.
Note 3: When the unit of the payment condition is "Designated Repayment Date", you can modify the "Due Date" and "Interval in months" to change the repayment due date.
Cost Management
Double-click the contract product line to add cost information.
Contract Documents
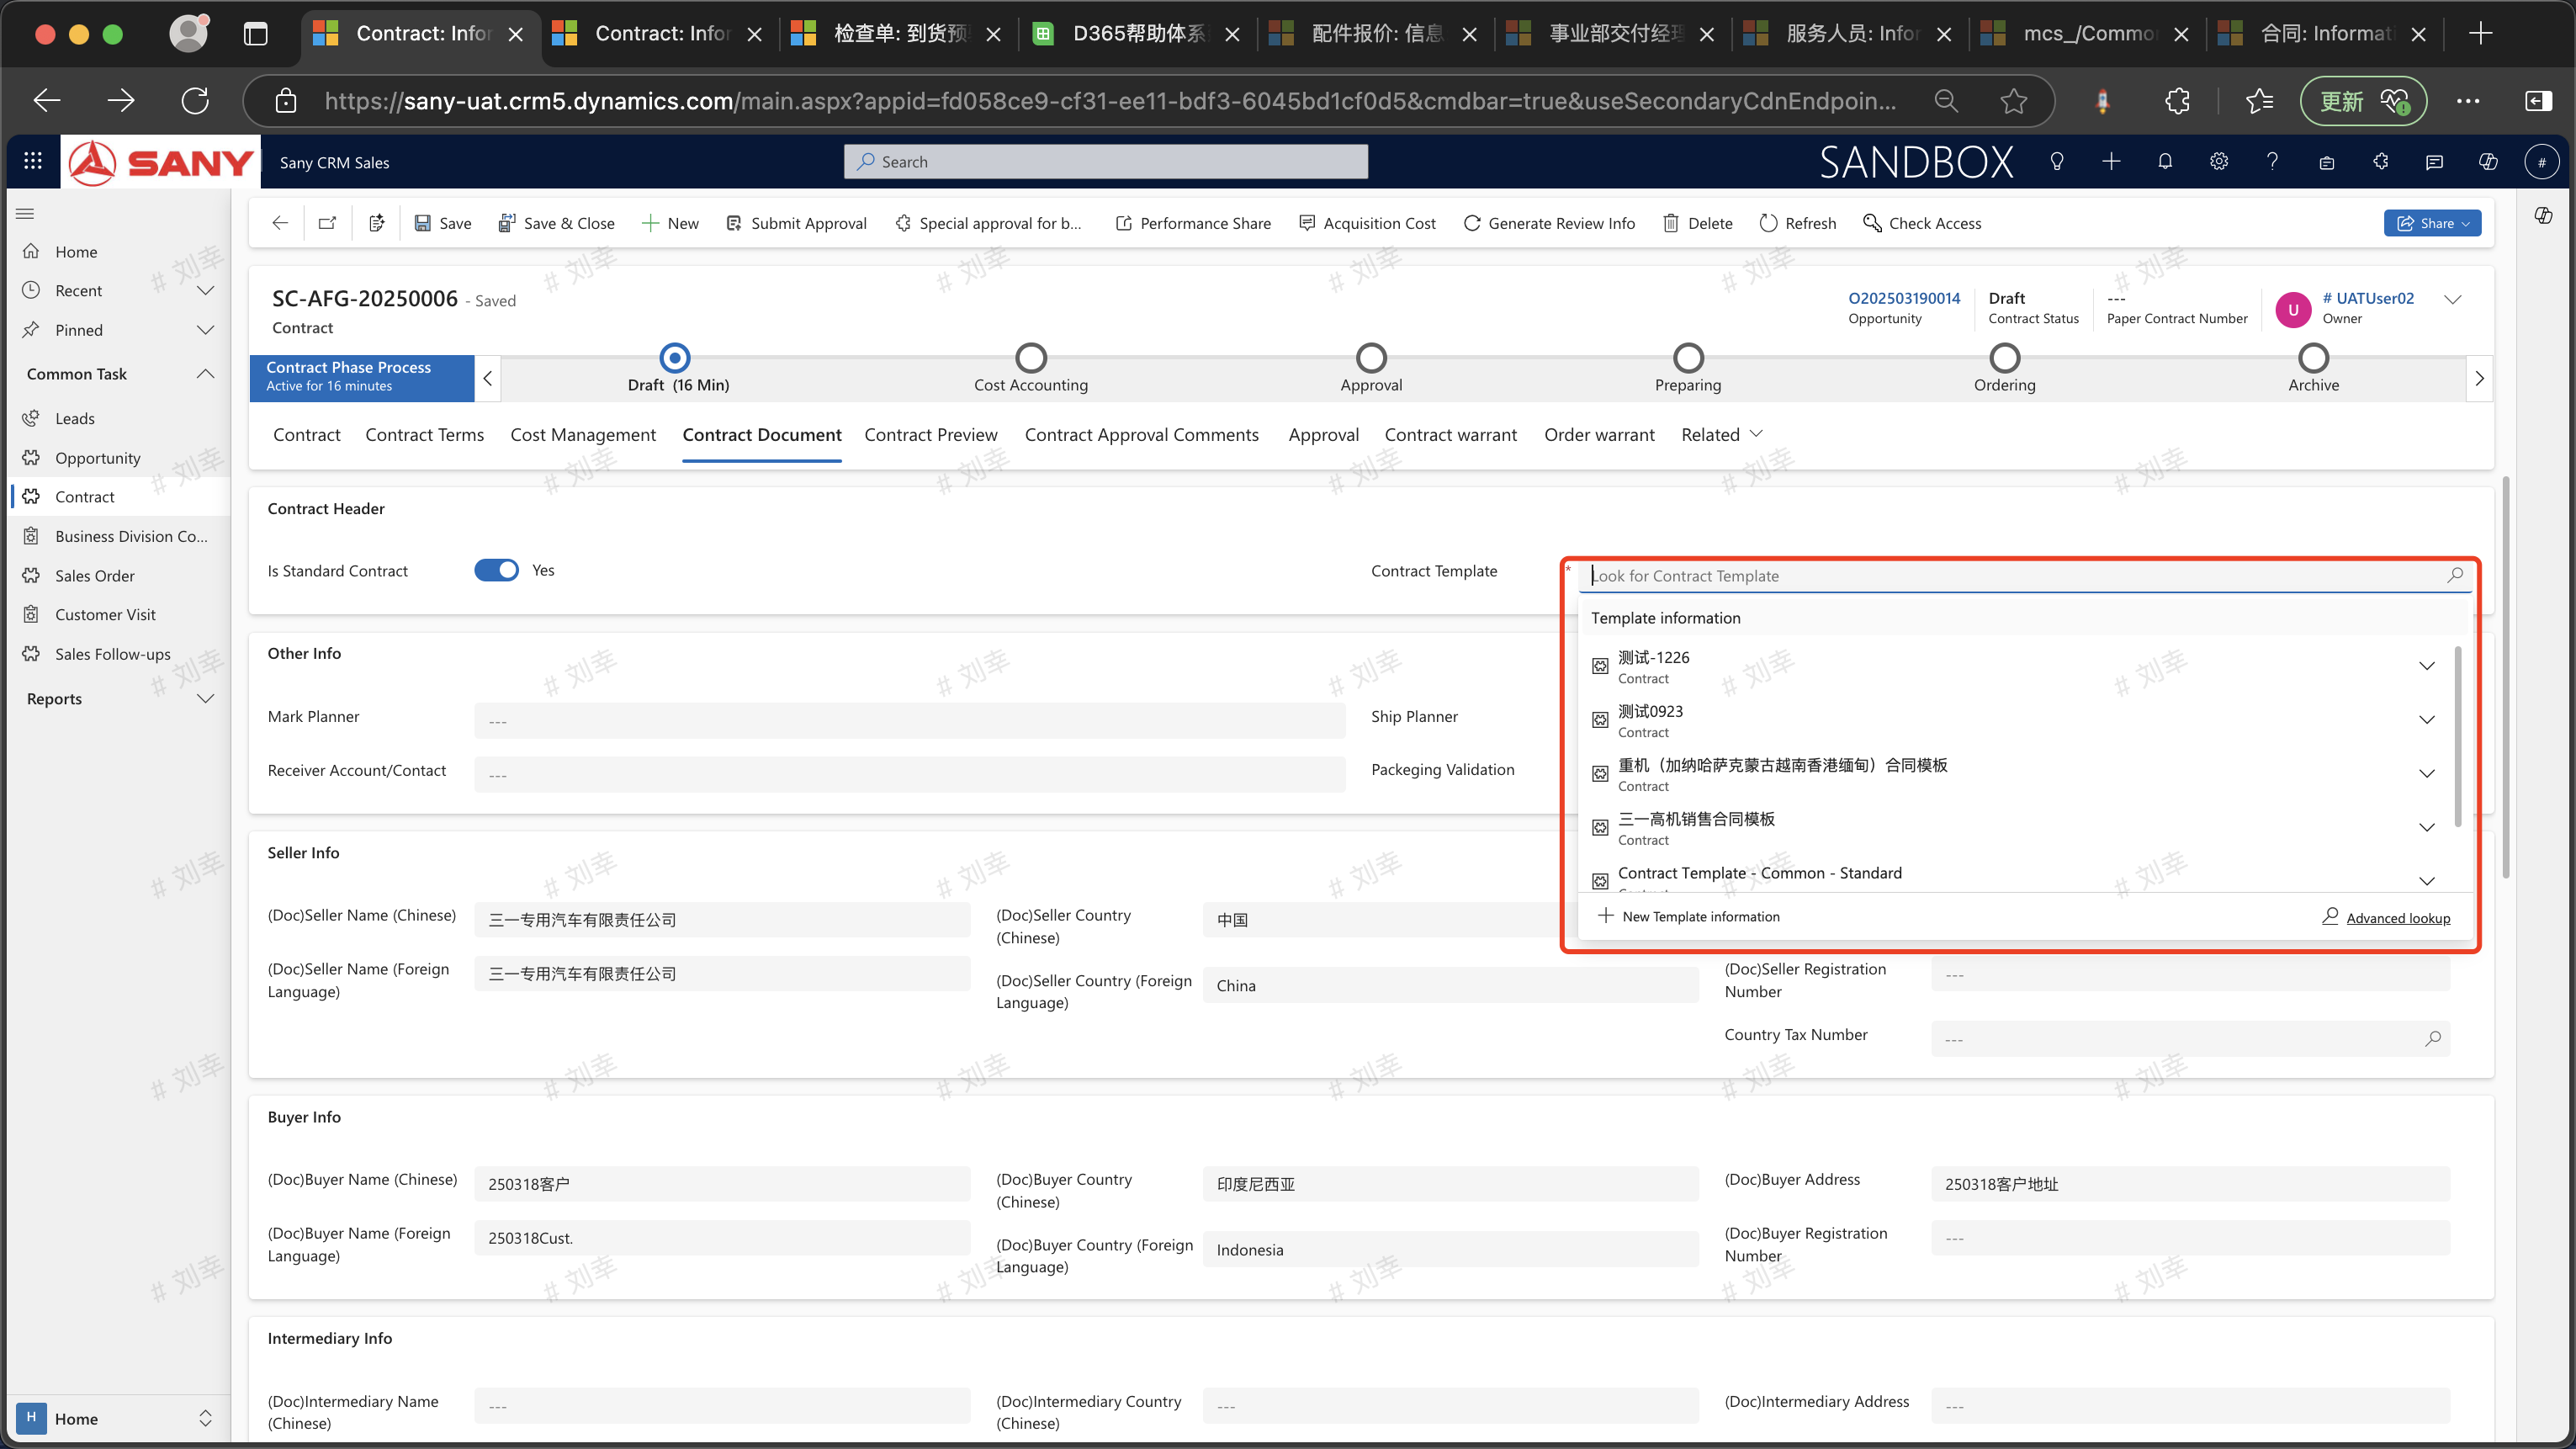
In the Contract Documents tab, when "Is it a Standard Contract?" is "Yes", you can select a standard contract template. After saving, you can view the electronic version of the contract in the contract preview.
When "Is it a Standard Contract?" is "No", you can upload your own contract in the "Prepared Contract Documents".
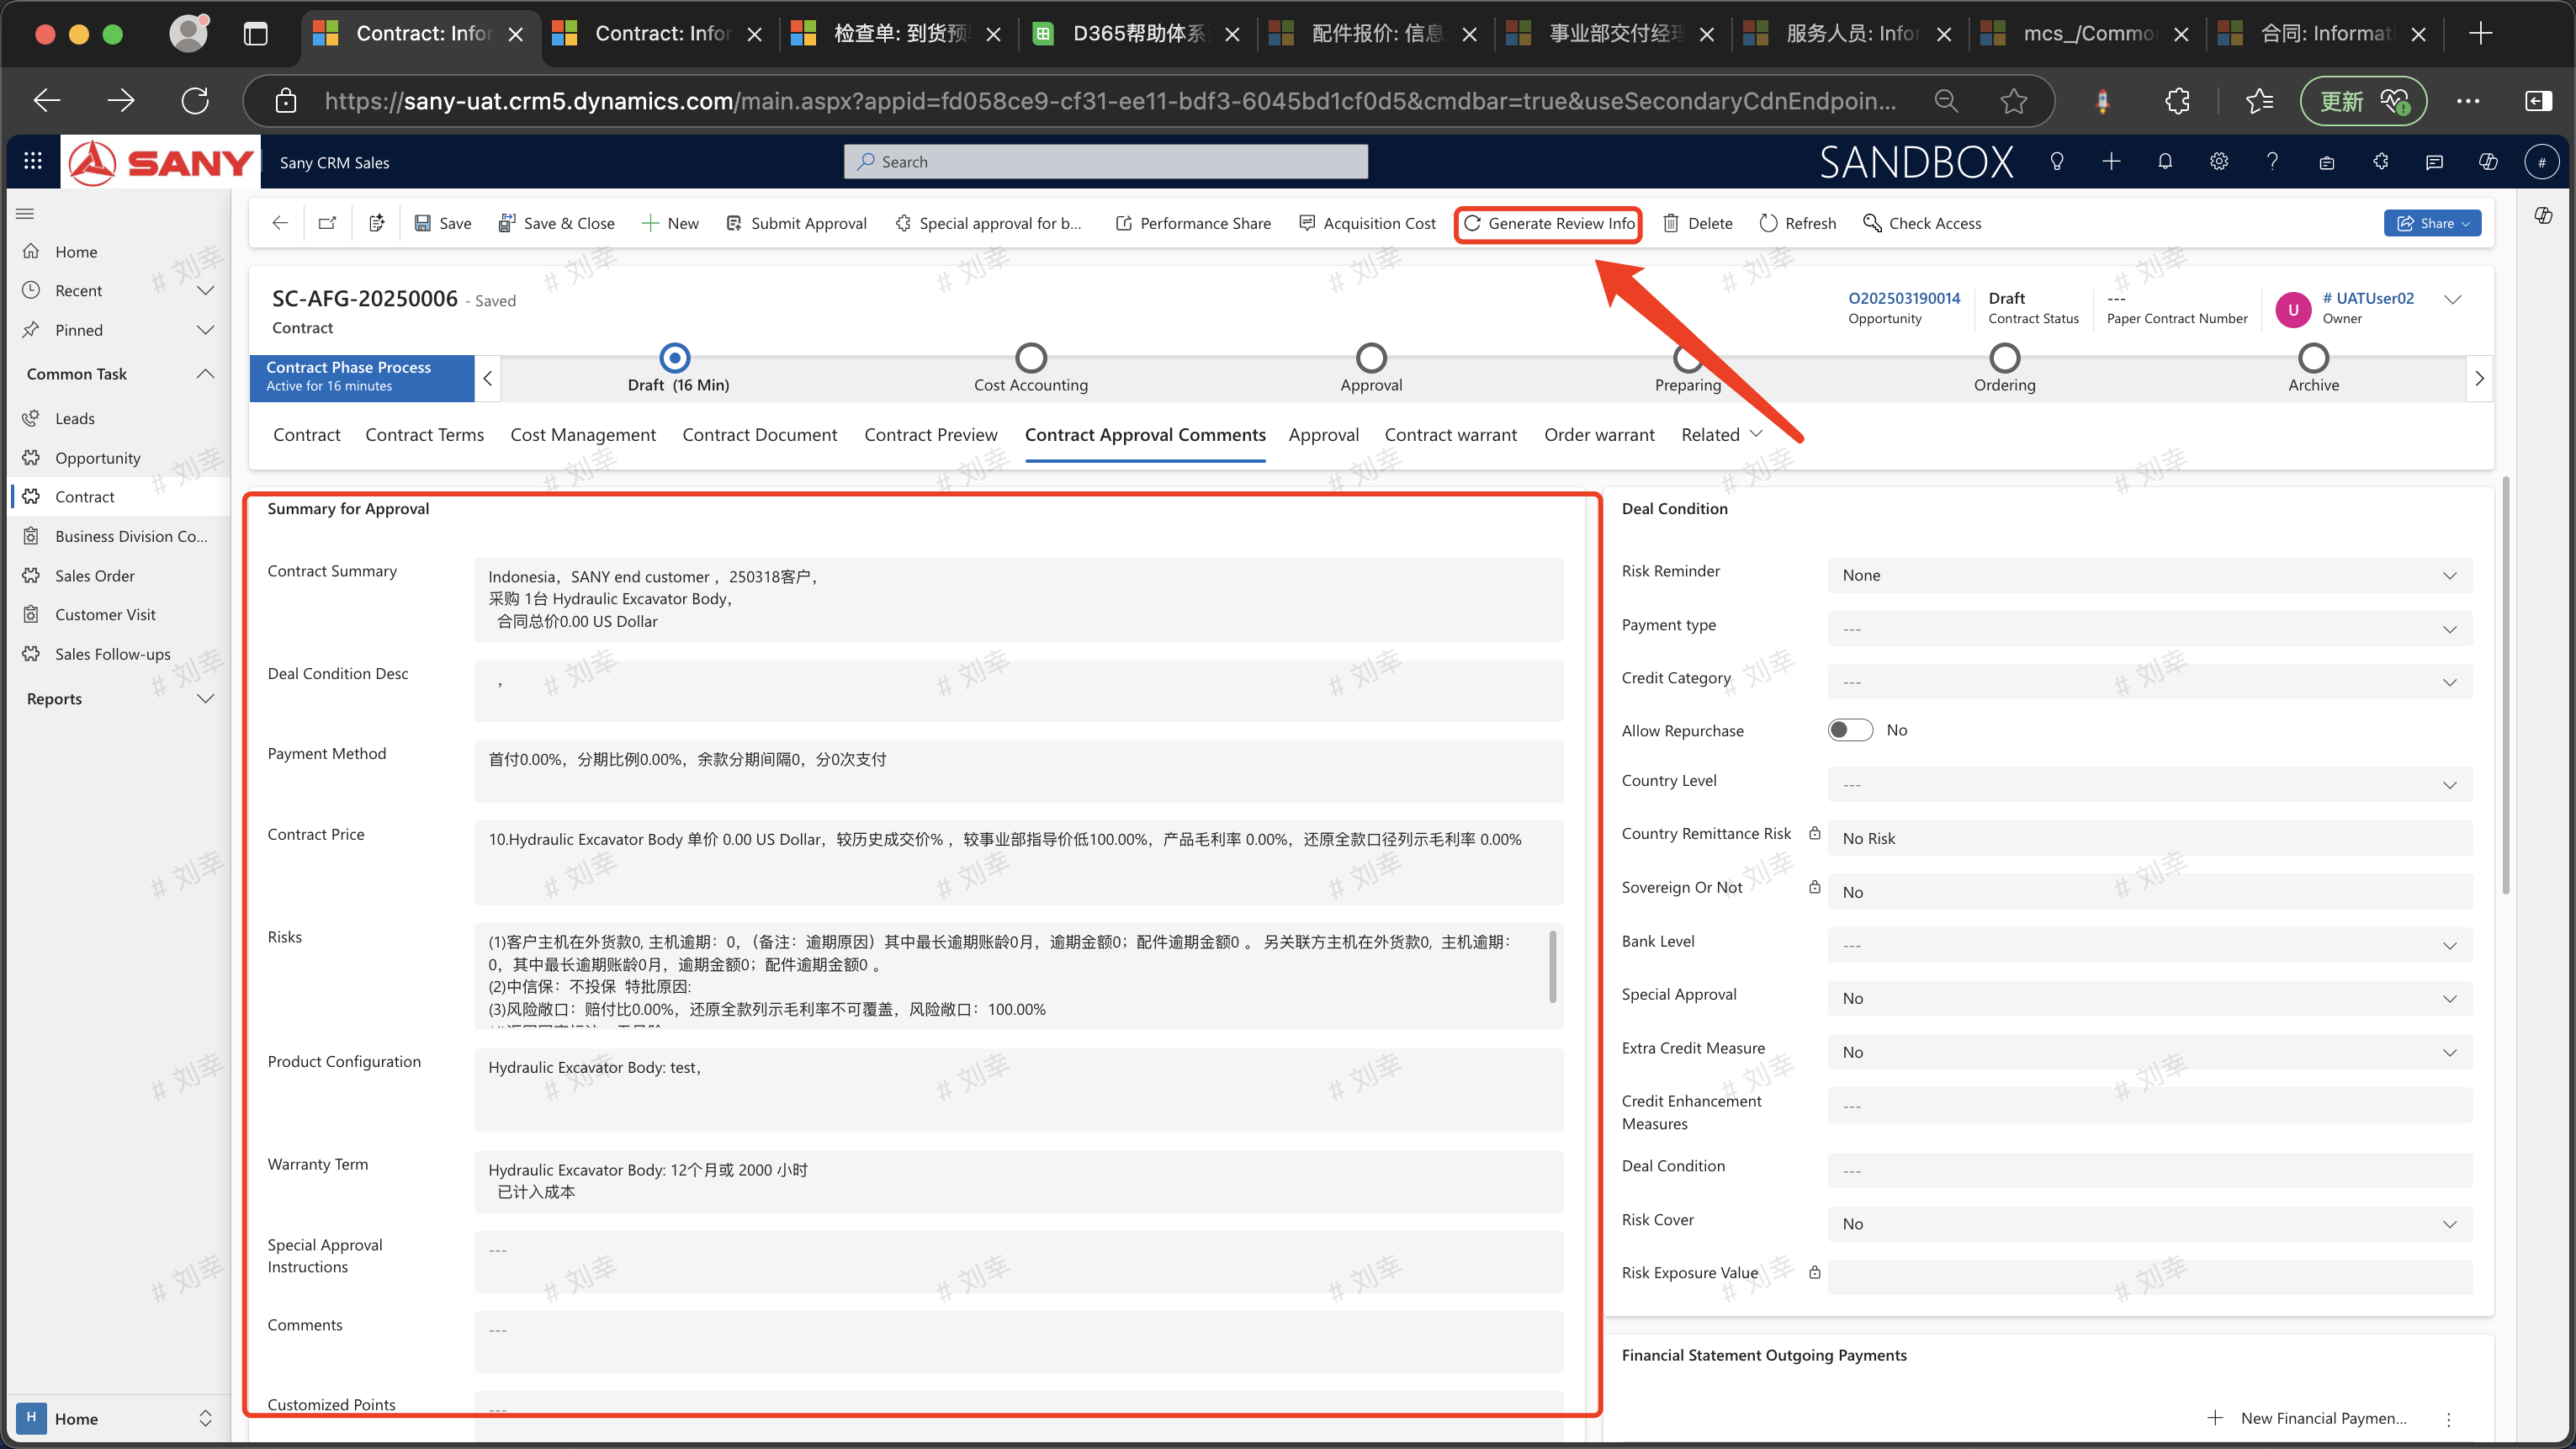
 Contract Review Opinions
Click the "Generate Review Information" button, and view the generated summary information in the "Contract Approval Opinions" tab. The summary information can be edited and modified.
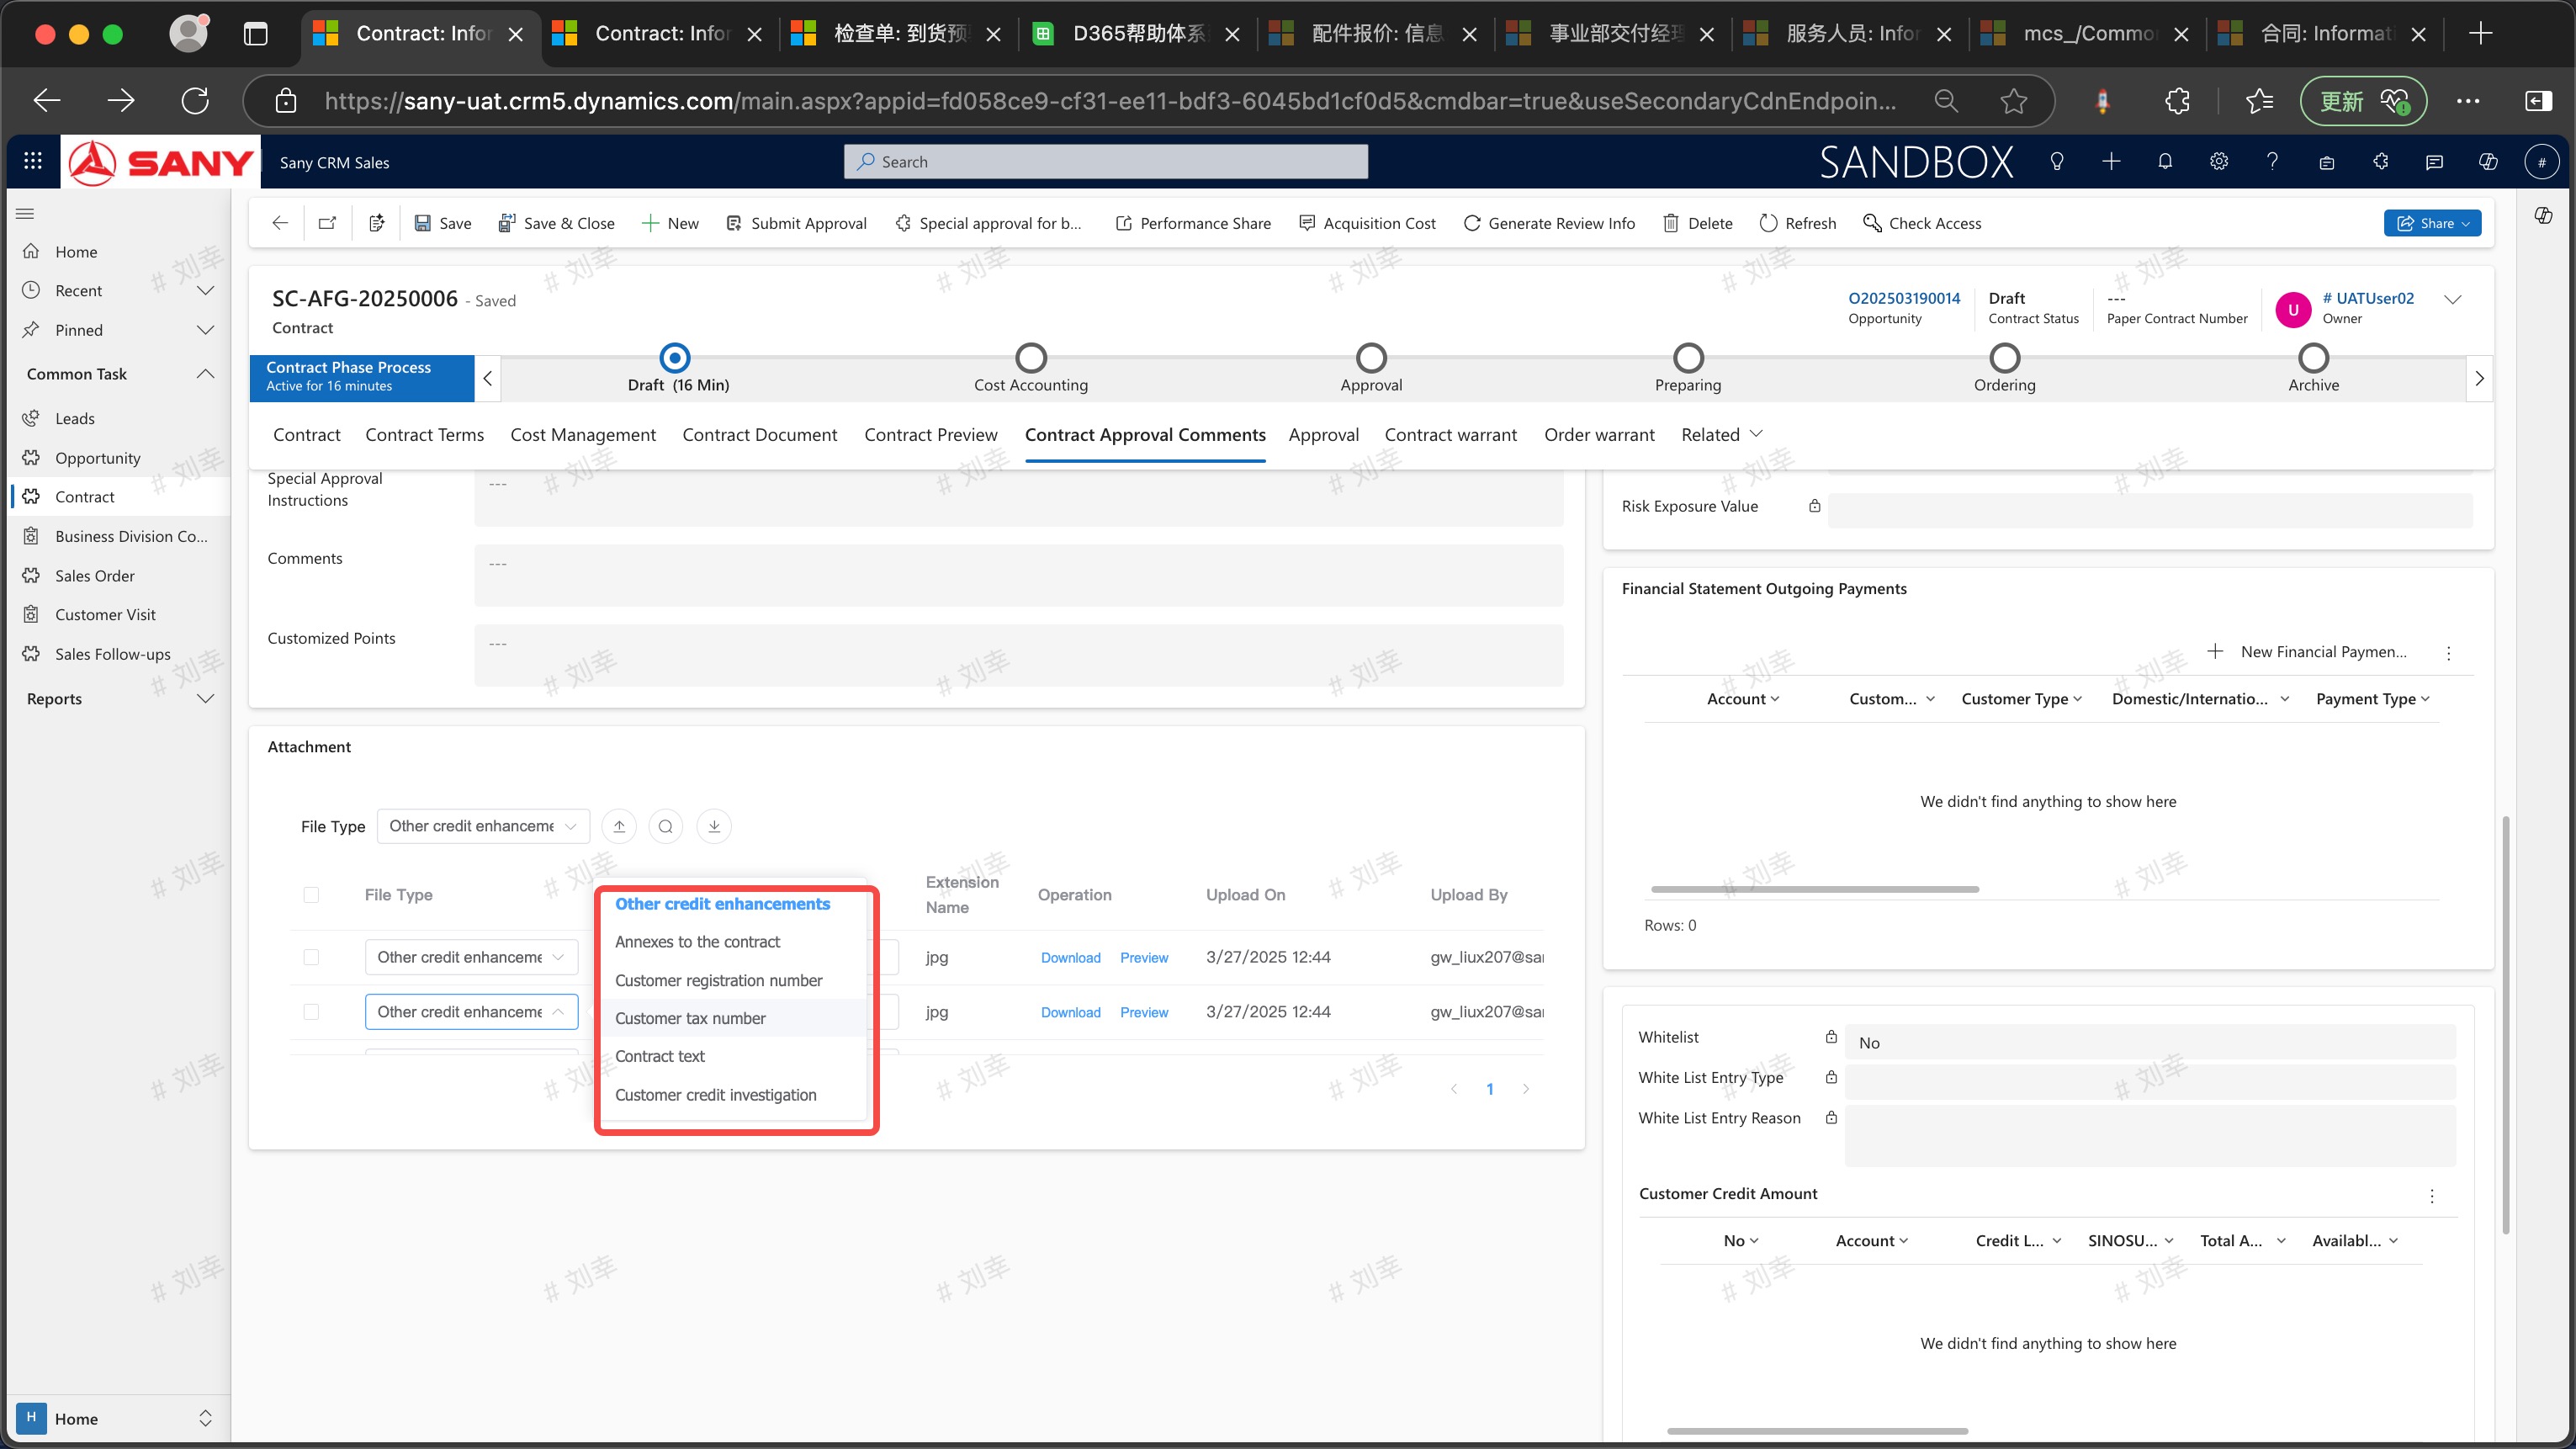
Select the "File Type" of the contract and then click the upload button.
Contract Review Opinions
Click the "Generate Review Information" button, and view the generated summary information in the "Contract Approval Opinions" tab. The summary information can be edited and modified.
Select the "File Type" of the contract and then click the upload button.
Select the "File Type" of the contract and then click the upload button.
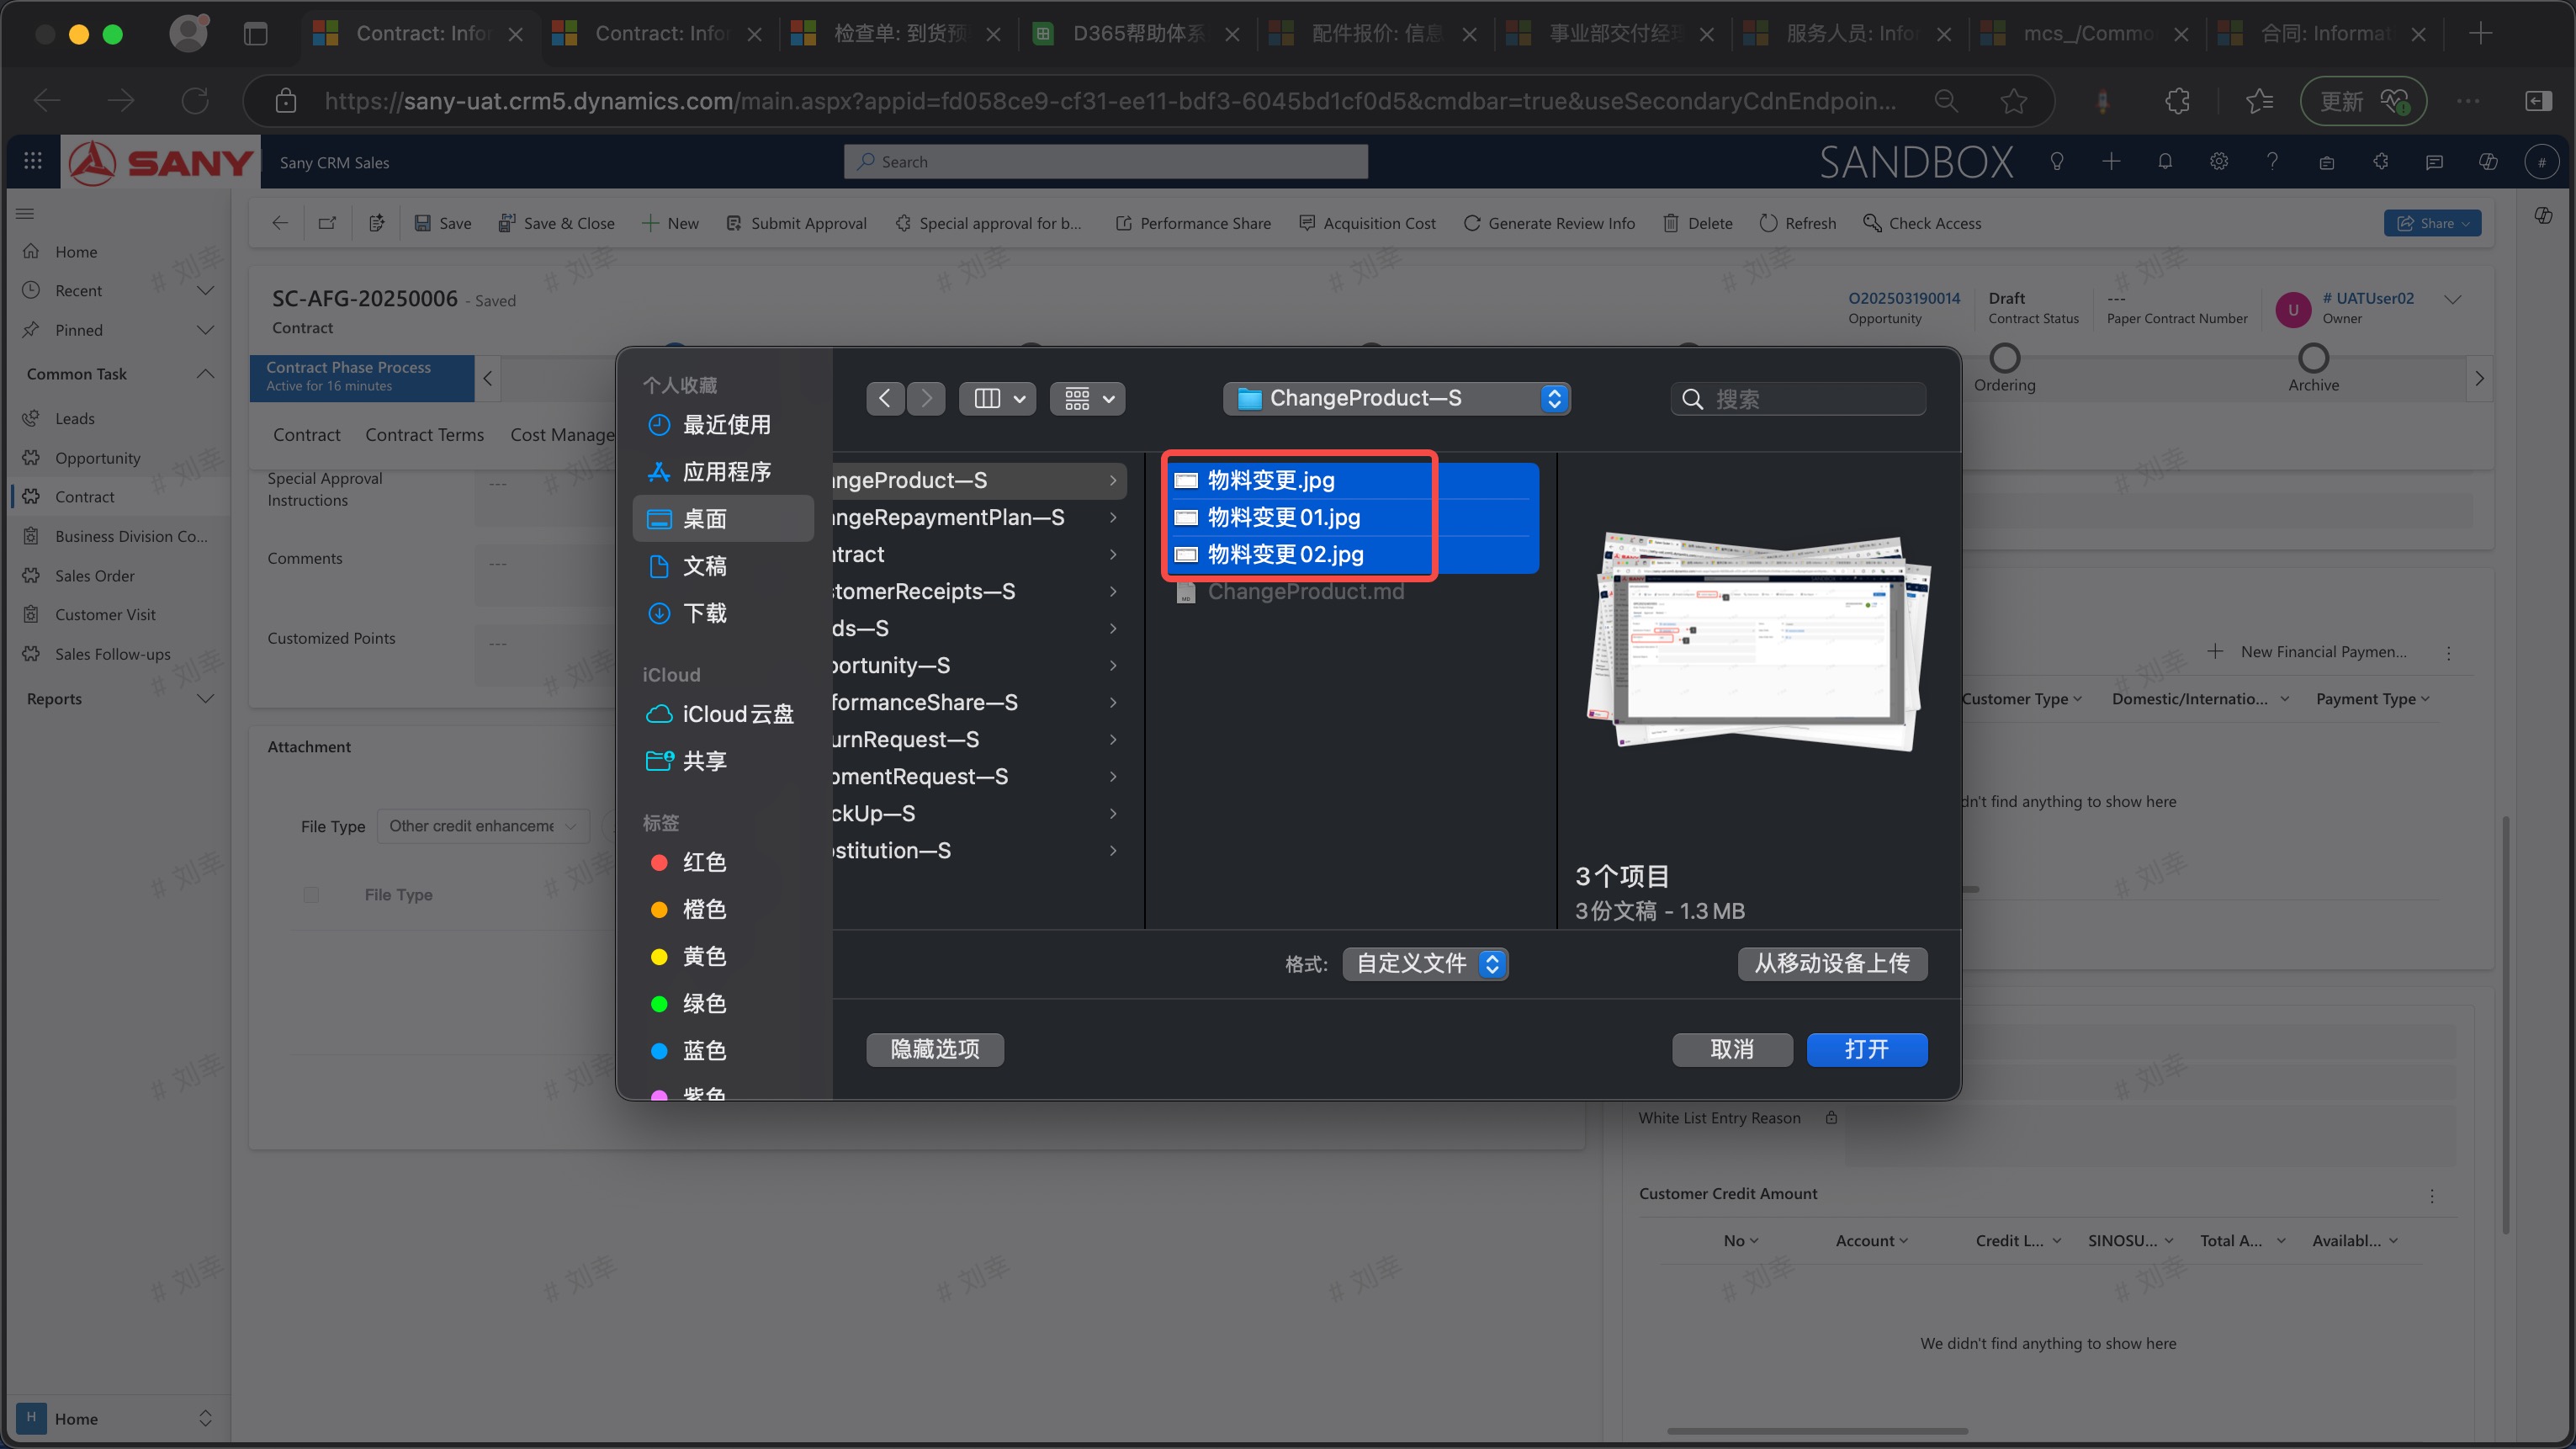
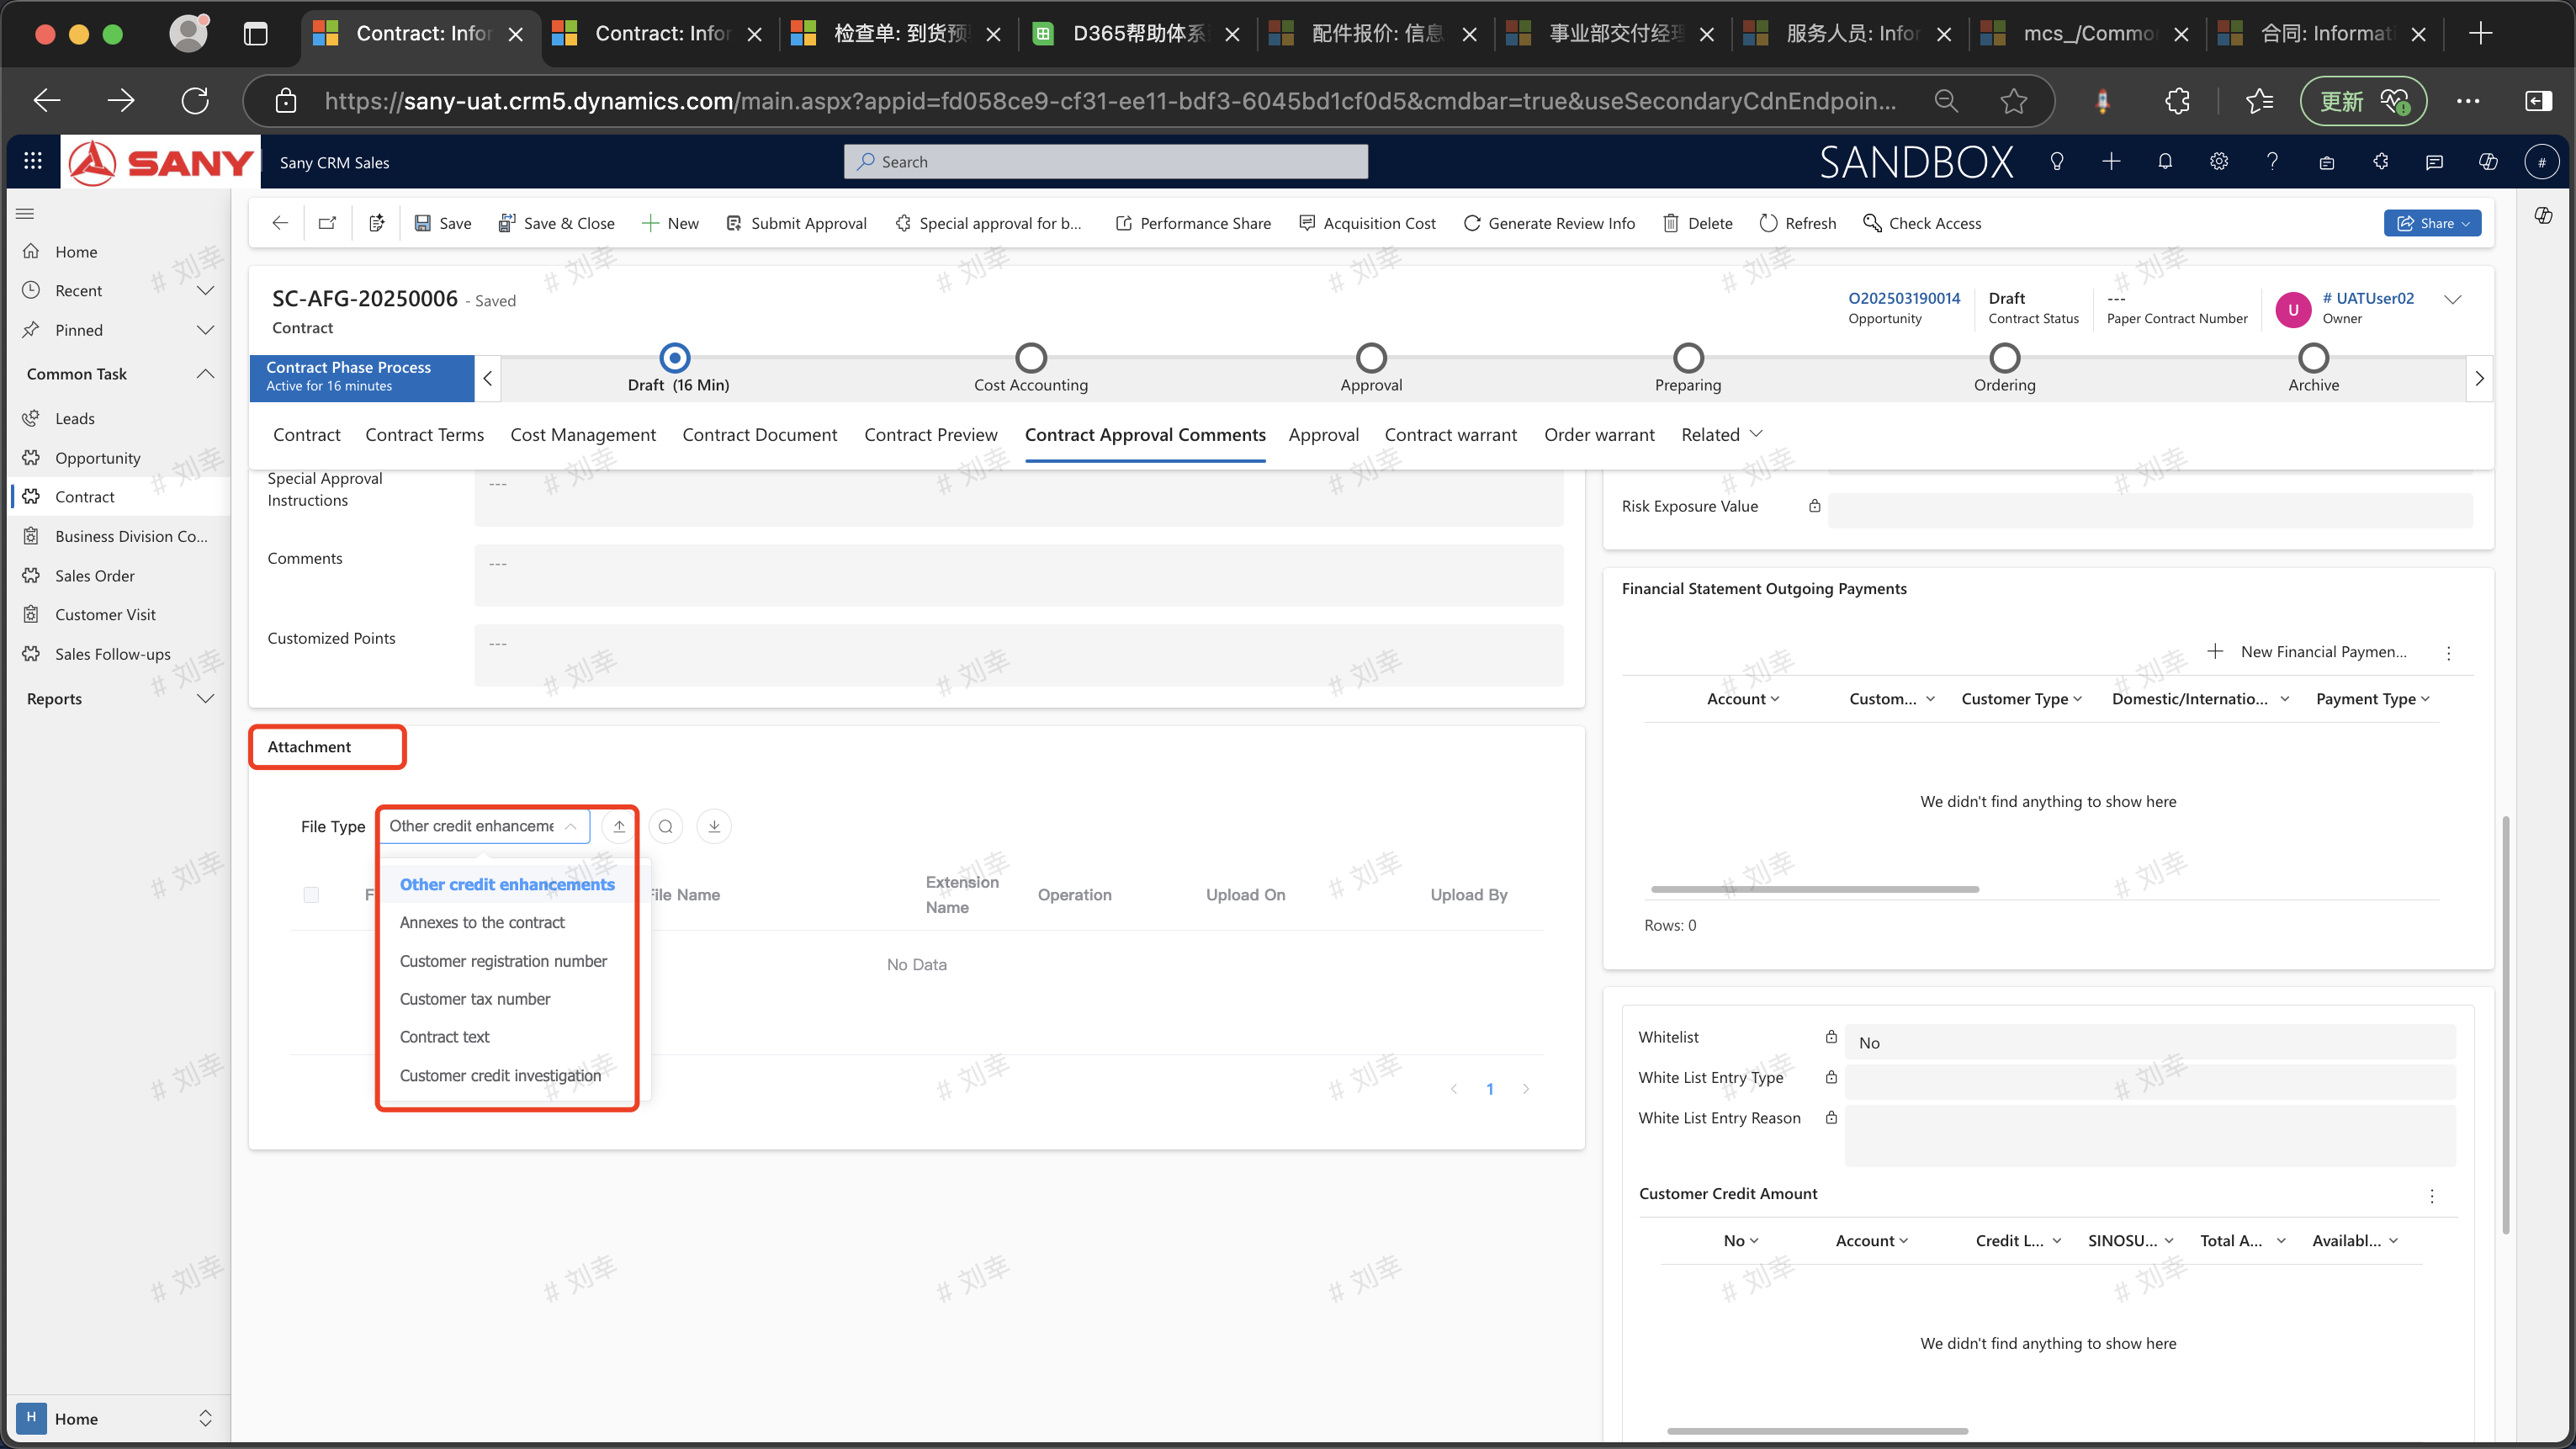 Attachments can also be uploaded in batches (hold down the Shift key to select files in batches) and then select the file type
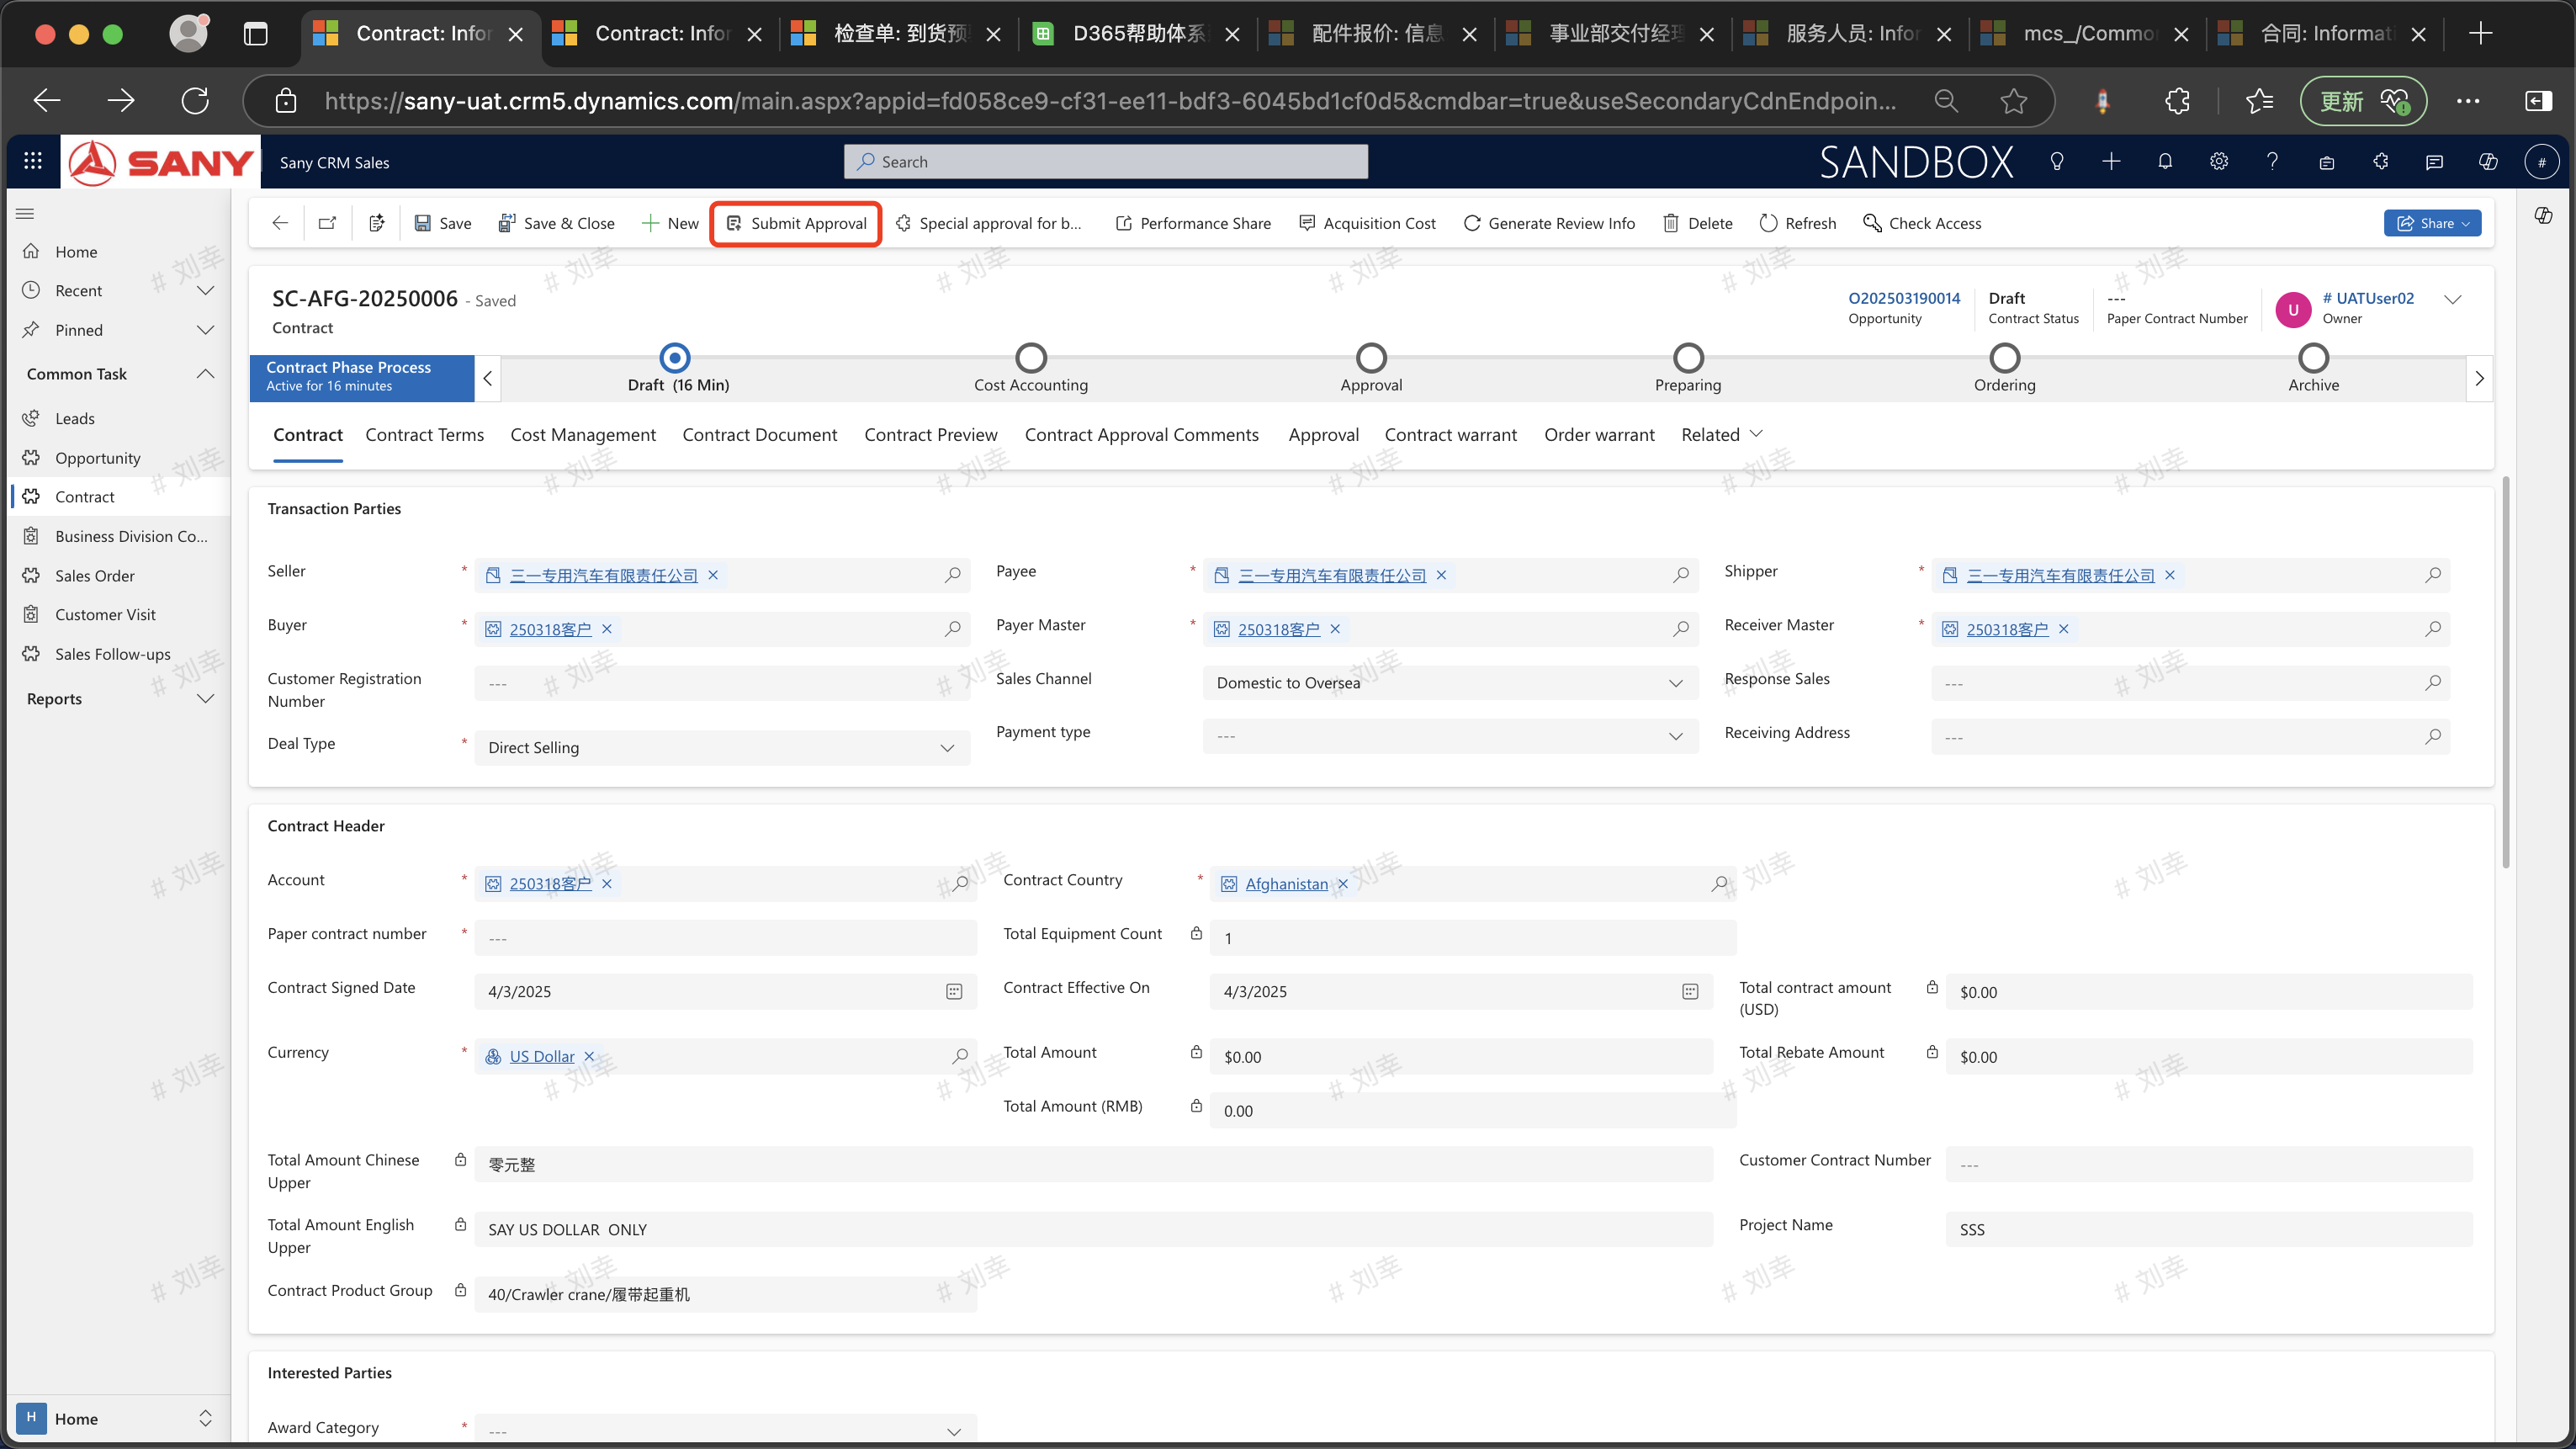
Submit for Approval
Click "Submit for Approval" as shown in the figure
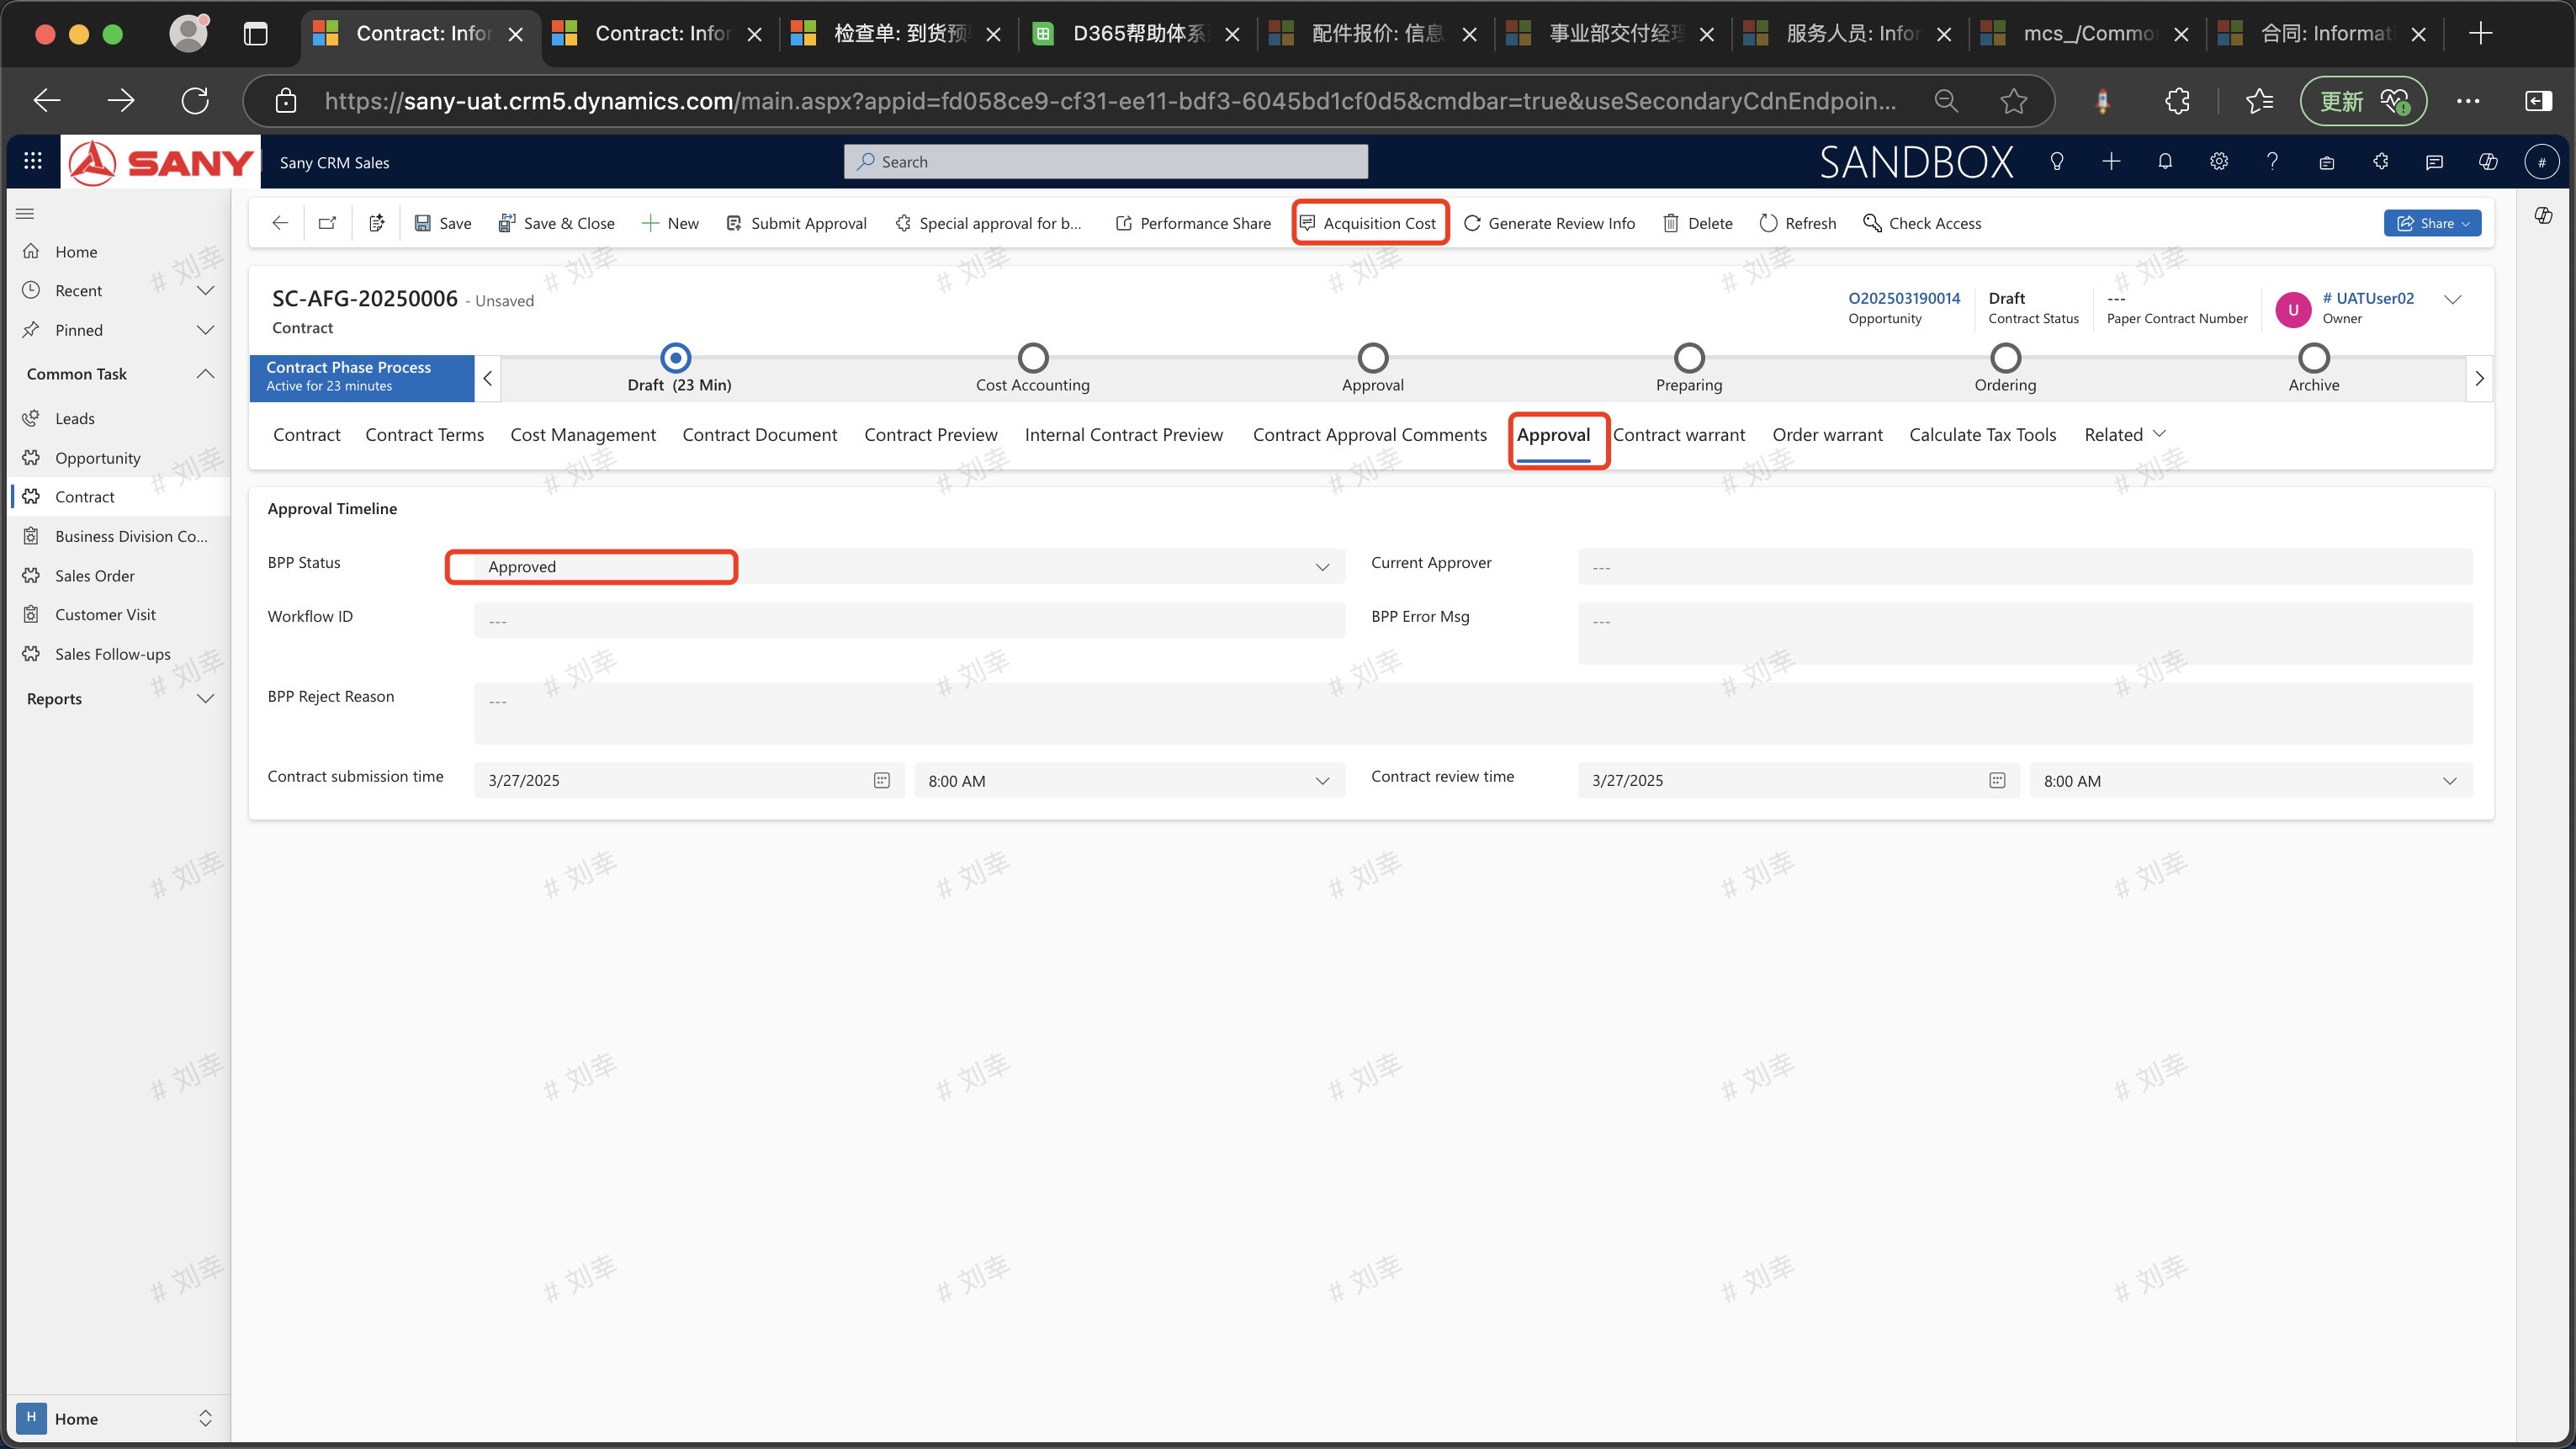
You can check the contract approval status in the "Approval" section. The status of the contract that has passed the approval will be changed to Approved.
Demo Video
FAQ
The business opportunity for direct sales/resale contracts cannot be empty!
!
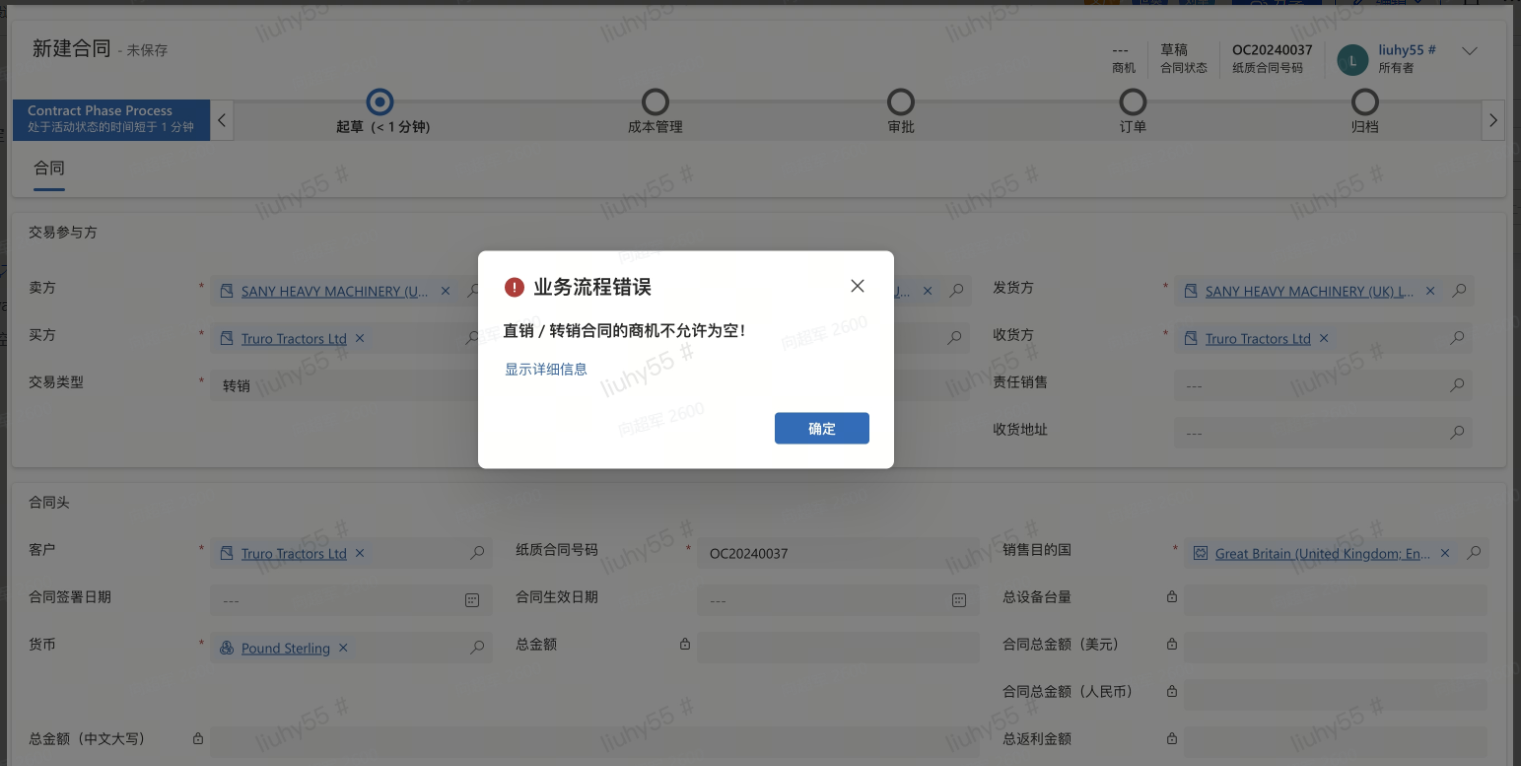
For the creation of direct sales and resale contracts, a lead needs to be created first. Then convert the lead to a business opportunity. After the business opportunity quotation is completed, click "Win the Deal" and then you can create a contract.
Error when converting business opportunity to contract: A validation error occurred. The length of the'mcs_cecustomizedforeignlanguage' attribute of the'mcs_contractdetail' entity exceeded the maximum allowed length of '1000'.**
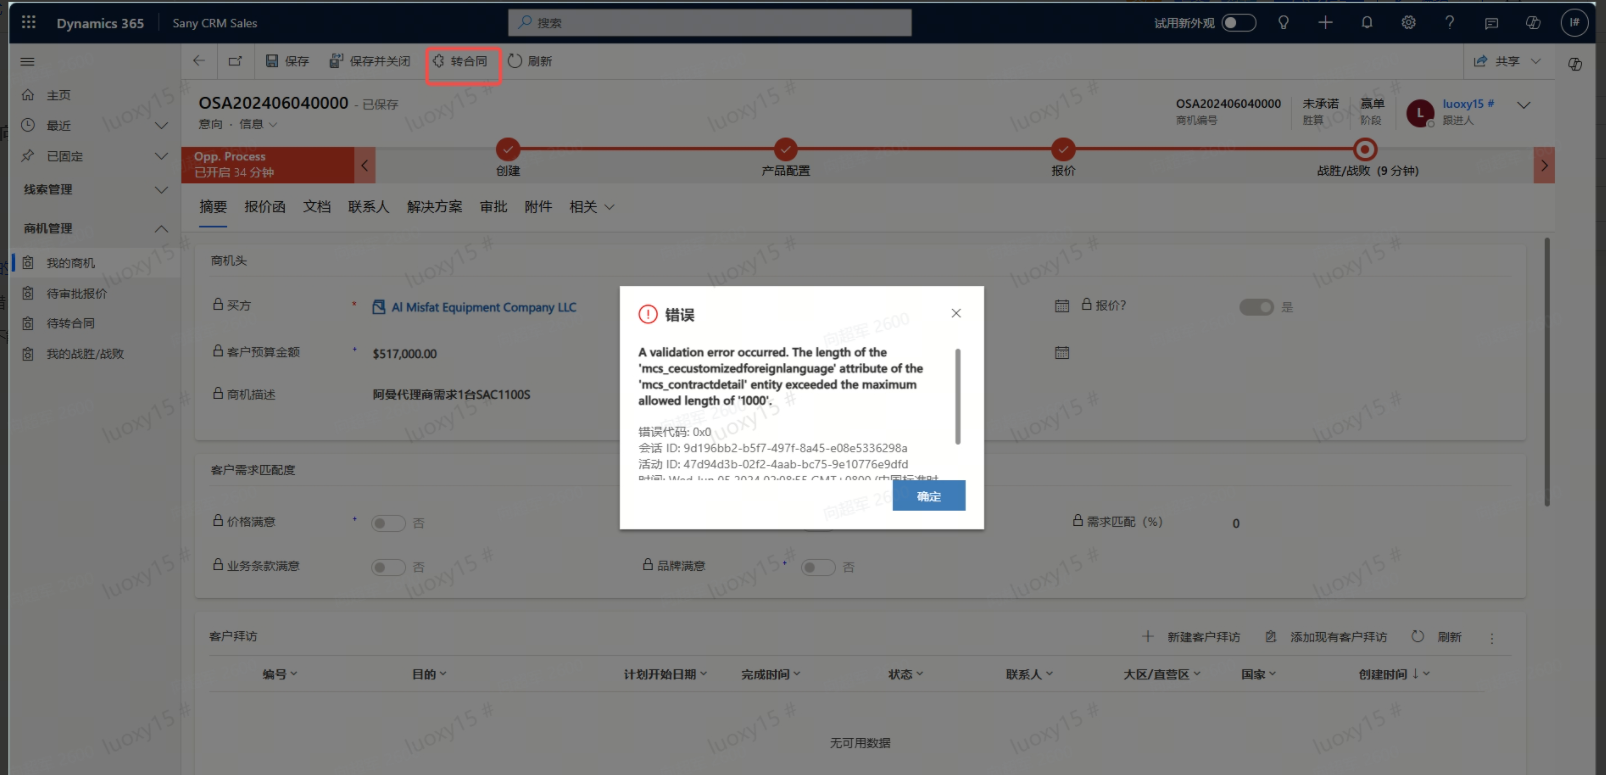
Cause Analysis:The length of the'mcs_cecustomizedforeignlanguage' attribute (field) of the'mcs_contractdetail' entity exceeds 1000. One letter accounts for 1 unit of length.

Solution:You can also add configuration descriptions in the contract documents.
The required receipt date cannot be empty.
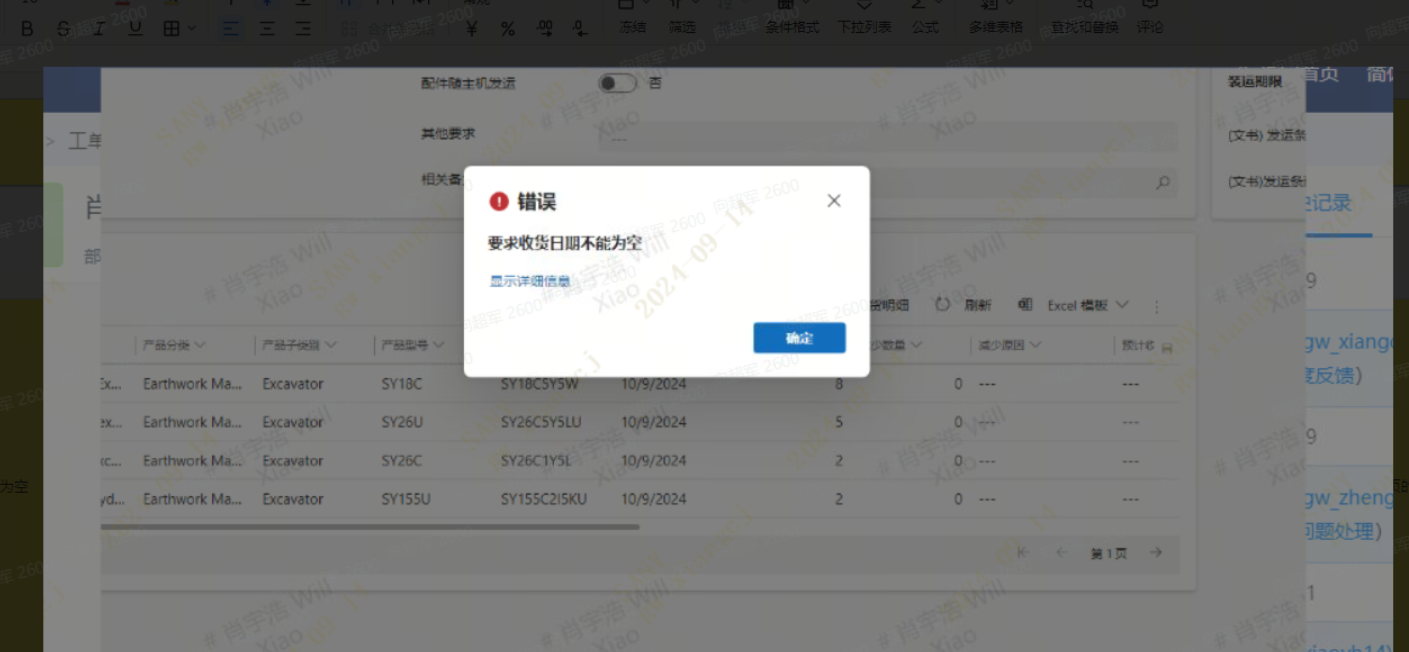
The required receipt date on the second page has not been filled in.